 Azeroth DB
Blackfathom Deeps (22 - 28)
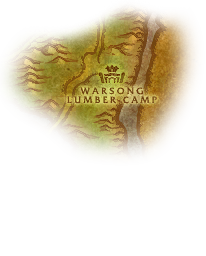
Requires level 22Quests: level 22–3010 playersAshenvale 16.5, 11.0
Bring up to ten players for the Ashenvale coast quests, the Soran'ruk Fragments or a full clear beneath Zoram Strand. The route crosses flooded caves and Twilight's Hammer ruins, then finishes with Kelris's brazier event and Aku'mai.


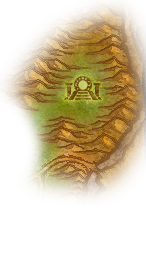
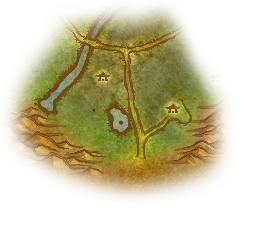
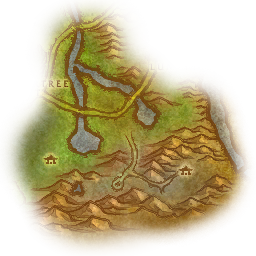
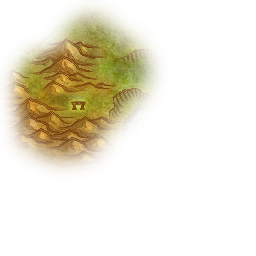
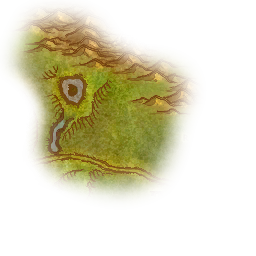
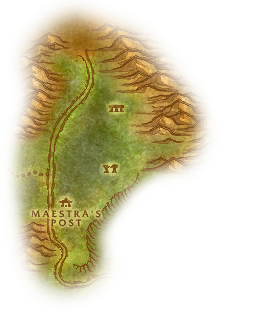
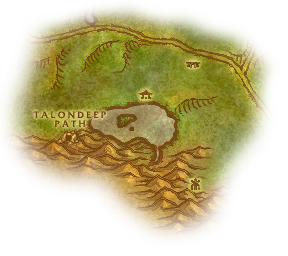
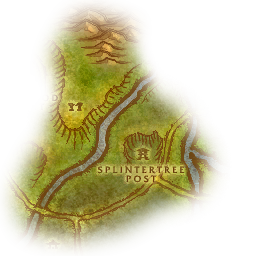
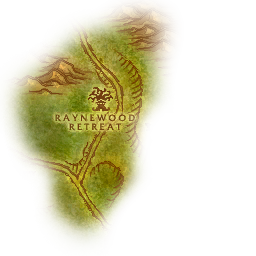
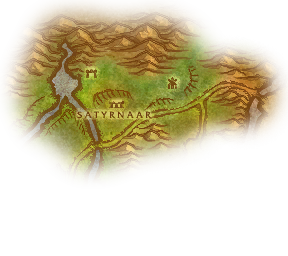

Preparation
Alliance: take Knowledge in the Deeps in Ironforge before travelling to Ashenvale. Collect the Lorgalis Manuscript from the submerged side room near the first pool before leaving the entrance caverns.
Alliance: collect In Search of Thaelrid in Darnassus. Look for Argent Guard Thaelrid in an alcove off the first flooded cavern before continuing towards the temple.
Alliance: take Twilight Falls in Darnassus and collect its 10 Twilight Pendants from the Twilight's Hammer cultists inside. Check the objective before leaving the temple rather than stopping after the early cave bosses.
Alliance: collect Researching the Corruption in Auberdine before the run. Its 8 Corrupted Brain Stems come from the naga and satyrs, so check those bodies while clearing the caves.
Horde: hand in Trouble in the Deeps at Zoram'gar Outpost and collect The Essence of Aku'Mai. Gather its 20 Sapphires of Aku'Mai from the wall clusters in the approach tunnels before entering the instance.
Horde: a Damp Note from a Blackfathom Tide Priestess starts Allegiance to the Old Gods. Take it to Zoram'gar Outpost and collect the follow-up that asks you to kill Lorgus Jett before committing to the full run.
Horde: take Amongst the Ruins at Zoram'gar Outpost before entering. Its Fathom Core is inside the submerged Fathom Stone in the Moonshrine Ruins; touching the stone can summon Baron Aquanis, so clear the surrounding water first.
Horde: after defeating the Fathom Stone's Baron Aquanis, keep the Strange Water Globe and use it to begin Baron Aquanis before leaving. Return it to Zoram'gar Outpost with the Fathom Core.
Both factions: speak to Argent Guard Thaelrid before killing Twilight Lord Kelris and accept Blackfathom Villainy. Keep the Head of Kelris for the correct return: Darnassus for the Alliance quest or Thunder Bluff for the Horde quest.
Warlocks: take The Orb of Soran'ruk before clearing the Twilight Acolytes. Collect 3 Soran'ruk Fragments here; the Large Soran'ruk Fragment comes from Shadowfang Keep, so Blackfathom Deeps alone does not finish the quest.
Paladins following Jordan Stilwell's The Test of Righteousness should check the gem objective before travelling. That quest asks for a Purified Kor Gem; arrange the gem step of the weapon quest before farming the naga approach.


Entrance pool
Swim through the submerged entrance and follow the naga tunnels to the portal together. In the first cavern, clear a route around Ghamoo-ra's island before pulling him. Make the side trips for Argent Guard Thaelrid and the Lorgalis Manuscript while the group is still at this pool.
Creatures
- Blackfathom Tide PriestessLevel 20–21 Elite Humanoid
Blackfathom Tide Priestesses can heal the naga you are trying to finish. Stop Heal before spending interrupts on Frostbolt; its slowing effect makes a retreat through the entrance tunnels harder.

Heal
Calls upon Holy magic to heal an ally.

Frostbolt
Inflicts Frost damage to an enemy and reduces its movement speed for 4 seconds.
Ghamoo-ra
Level 25 Elite BeastGhamoo-ra's Trample punishes bringing the ranged group into the turtle's melee cluster.
Abilities

Trample
Trample hits nearby enemies. Keep ranged players back from Ghamoo-ra and heal the players who must remain in melee.
 Tank
- Clear the island before engaging Ghamoo-ra and keep the fight there, giving ranged players a cleared position outside Trample.
 Healer
- Heal from outside the melee cluster and cover Trample damage on the close-range players without moving onto the turtle yourself.
 Damage
- Use a ranged position when your attacks allow it; melee players should stay in healing range for Trample rather than bringing the ranged group onto the island.
Loot


Naga and satyr caves
Take the side passage to Lady Sarevess and control an escort before committing to her pull. Continue through the satyr caves towards Gelihast, clearing the murlocs around his fighting space separately. Do not start Gelihast while the group is still moving through an uncleared pack: Net can stop that movement.
Creatures
- Blackfathom MyrmidonLevel 22–23 Elite Humanoid
A Blackfathom Myrmidon's Disarm removes the tank's weapon. Hold weapon-based burst while the tank is disarmed instead of making Sarevess's nearby naga pulls a threat race.

Disarm
Disarms an enemy, forcing it to stop wielding its weapon for 10 seconds.
- Fallenroot HellcallerLevel 24–25 Elite Demon
Fallenroot Hellcallers drain mana with Mana Burn as well as dealing Shadow Bolt damage. Reserve an interrupt for Mana Burn so the healer reaches the next cave with mana remaining.

Mana Burn

Shadow Bolt
Hurls a bolt of dark magic at an enemy, inflicting Shadow damage.
Lady Sarevess
Level 25 Elite HumanoidLady Sarevess requires control of her escorts without exposing the group to Forked Lightning while Frost Nova limits movement.
Abilities

Forked Lightning
Forked Lightning hits a cone in front of Sarevess. Keep everyone except her tank out of that cone and interrupt the cast when possible.

Frost Nova
Frost Nova freezes nearby players. Choose a safe facing before the root lands and remove it when it prevents someone escaping Forked Lightning's cone.

Slow
Slows the enemy's movement by 150% and their attack speed by 35% for 10 seconds.
Slow hinders movement and attacks. Remove it from a player who needs to reposition; running away through uncleared naga is not a safe answer.

Shoot
Shoots at an enemy, inflicting Physical damage.
Sarevess can Shoot at range. Retreat towards cleared space if the pull goes wrong rather than assuming distance stops all her damage.
- Tank
- Gather Sarevess and the uncontrolled escort, then point her Forked Lightning cone into cleared space. Establish that facing before Frost Nova can root you.
- Healer
- Stand outside Sarevess's frontal cone; remove Frost Nova or Slow when either prevents a player reaching safety, while covering damage from the uncontrolled escort.
- Damage
- Control one escort and finish the other before focusing Sarevess. Keep interrupts for Forked Lightning and move to her side instead of standing in the tank's frontal position.
Loot



Geilhast
GelihastLevel 26 Elite HumanoidGelihast's Net makes finishing the surrounding murloc pulls before the boss safer than trying to reposition during the fight.
Abilities

Net
Immobilizes an enemy for 10 seconds.
Net immobilizes its target. Clear the fighting space before engaging Gelihast and keep rooted players within healing range.
- Tank
- Finish the murloc pulls around Gelihast before taking him, then establish the fighting position before Net prevents movement.
- Healer
- Choose a position that reaches the tank and the ranged players before the pull; a player caught in Net cannot move closer for healing.
- Damage
- Keep the pull inside the cleared cave. If Net catches you, continue attacking from that position instead of drawing another pack while trying to reach Gelihast.
Moonshrine Ruins
Work through the Twilight's Hammer groups and find Lorgus Jett before leaving the ruins. Horde groups should clear the water around the Fathom Stone before collecting the Fathom Core and fighting its Baron Aquanis summon; check for the Strange Water Globe afterwards. Take the underwater detour to Old Serra'kis before returning to the ritual chamber, with enough breath to fight and swim back.
Creatures
- Twilight AcolyteLevel 24–25 Elite Humanoid
Twilight Acolytes can extend a cultist pull with Heal and Renew. Stop Heal and remove Renew from the current target if the group has an offensive dispel. Warlocks should check these bodies for Soran'ruk Fragments before moving on.
Heal

Renew
- Twilight ShadowmageLevel 26–27 Elite Humanoid
Twilight Shadowmages can turn a player against the group with Dominate Mind. Save a stop for that cast rather than using every interrupt on Shadow Bolt; control an affected ally instead of killing them.

Dominate Mind
Shadow Bolt
Hurls a bolt of dark magic at an enemy, inflicting Shadow damage.

Lorgus Jett
Level 26 Elite HumanoidLorgus Jett combines Lightning Bolt casts with Lightning Shield retaliation against weapon attackers.
Abilities

Lightning Bolt
Blasts an enemy with lightning, inflicting Nature damage.
Interrupt Lightning Bolt so Jett's Nature damage does not overlap with Lightning Shield retaliation on the tank and melee players.

Lightning Shield
Lightning Shield retaliates against melee or ranged attacks. Remove the shield with an offensive dispel when available; avoid spending weapon burst into it.
- Tank
- Pull Jett clear of other Twilight groups before engaging, then keep an interrupt for Lightning Bolt while weapon hits can trigger his Lightning Shield.
- Healer
- Watch the weapon attackers as well as the tank for Lightning Shield retaliation; be ready for extra Nature damage when a Lightning Bolt completes.
- Damage
- Remove Lightning Shield before weapon burst if the group can dispel it, and share Lightning Bolt interrupts rather than letting every cast land while attacking into the shield.

Old Serra'kis
Level 26 Elite BeastOld Serra'kis turns the underwater detour into a fight where the group must keep enough breath to stay within healing range.
- Tank
- Keep Old Serra'kis close enough to the surface that the group can take air without swimming out of the healer's reach.
- Healer
- Watch your breath while healing the swimmers below you, and account for players surfacing before they leave your healing range.
- Damage
- Surface before your breath runs out, then return to the tank's Old Serra'kis position rather than continuing farther through the flooded passage.
Loot


Kelris's altar
Clear the ritual chamber before pulling Twilight Lord Kelris, leaving the healer back from his melee group. Loot the Head of Kelris before beginning the brazier event. Light one brazier at a time, defeat its wave and recover before touching the next; finish the waves before taking the door to Aku'mai.
Creatures
- Twilight AquamancerLevel 25–26 Elite Humanoid
Twilight Aquamancers can add another enemy with Summon Aqua Guardian. Stop that summon before pulling another cultist group; Frostbolt also slows anyone trying to bring the caster back to the tank.

Summon Aqua Guardian
Summons 1 Aqua Guardian to accompany the caster until dismissed.
Frostbolt
Inflicts Frost damage to an enemy and reduces its movement speed for 4 seconds.
- Aku'mai SnapjawLevel 26–27 Elite Beast
Aku'mai Snapjaws can stun their target with Ravage. Keep the turtle wave under control before lighting another brazier so a stunned tank is not left with a fresh wave as well.

Ravage
- Aku'mai ServantLevel 26 Elite Elemental
Aku'mai Servants combine nearby Frostbolt Volley damage with Frost Nova roots. Stop the volley and finish the servants before continuing through the final doorway; a rooted group should not still have an active brazier wave behind it.
Frostbolt Volley
Frost Nova
Twilight Lord Kelris
Level 27 Elite HumanoidKelris's nearby Sleep can disable the tank or healer while Mind Blast continues threatening the players still awake.
Abilities

Sleep
Puts nearby enemies to sleep for up to 10 seconds. Any damage caused will awaken them.
Keep a healer or magic dispeller back from Kelris's melee group. Remove Sleep from the tank or another healer promptly rather than relying on an interrupt to recover them.

Mind Blast
Inflicts Shadow damage to an enemy, but causes a high amount of threat.
Mind Blast deals Shadow damage to its target. Restore that player's health while arranging a wake-up if Sleep has disabled the tank or healer.
- Tank
- Arrange who removes your Sleep before pulling Kelris. Recover control as soon as you wake so an unprepared player does not keep taking his melee attacks alongside Mind Blast.
- Healer
- Stay back from Kelris's melee cluster and prioritize waking the tank or a sleeping healer. Heal Mind Blast damage on whoever Kelris is currently attacking.
- Damage
- If Sleep disables the tank, pause burst until the tank is awake and controlling Kelris again. Keep a ranged position when possible instead of joining the nearby Sleep targets.
Loot


Aku'mai's chamber
Regroup beyond the opened door before starting Aku'mai. Leave the ranged players back from the hydra so Poison Cloud does not reach the whole group, and arrange poison removal before the pull. Keep a defensive ready for Frenzied Rage rather than spending everything on the opening attacks.
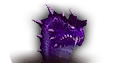
Aku'mai
Level 28 EliteAku'mai combines nearby poison damage with Frenzied Rage, requiring poison removal without neglecting the tank's faster incoming attacks.
Abilities

Poison Cloud
Poison Cloud poisons nearby enemies. Keep ranged players back from Aku'mai and remove the poison from affected players; moving away does not replace curing an existing poison.
Frenzied Rage
Increases the caster's attack speed by 75% for 5 seconds, but reduces the Physical damage dealt by 15.
Save a tank defensive and additional healing for Frenzied Rage's faster attacks instead of spending them all on the opening pull.
- Tank
- Hold Aku'mai away from the ranged group so Poison Cloud reaches fewer players. Use a defensive when Frenzied Rage appears and tell the healer if poison is still on you.
- Healer
- Remove Poison Cloud from affected players while keeping the tank ready for Frenzied Rage. Stay back from Aku'mai so your own poison damage does not compete with that healing.
- Damage
- Ranged players should remain back from the hydra; melee players should make poison removal easy by staying in the healer's reach. Keep attacking during Frenzied Rage without moving Aku'mai into the ranged group.
Loot


 WoW Forever dungeons up to level 30: which to run at your level and what to bring
 WoW Forever beta patch notes: October 1
 WoW Forever Wolf’s Bane: the Forsaken paladin’s level 20 weapon quest