 Azeroth DB
Deadmines (16 - 20)
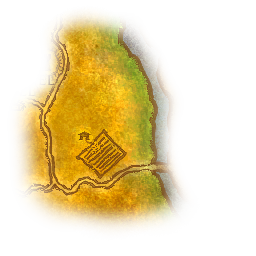
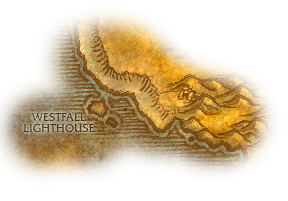
Requires level 16Quests: level 16–2510 playersWestfall 38.2, 77.5
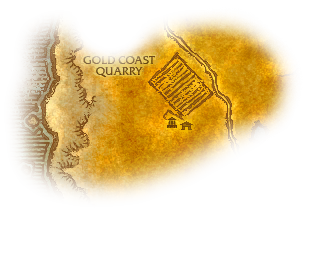
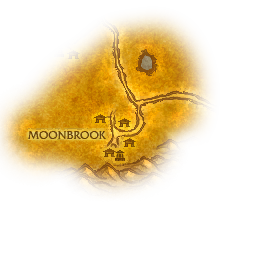
Westfall's demolition quest and both paladin weapon routes bring groups into the mines beneath Moonbrook; up to 10 players can enter. Clear the lumber room and forge, then climb the ship in Ironclad Cove to finish with Edwin VanCleef.







Preparation
For Alba Fairmoon's Westfall chain, finish Explosive Consultation and take the Extra-Destructive Explosives into the dungeon for Destruction in Deadmines. Plant them beside the forge, then return to Alba at the exit behind Moonbrook before completing the separate detonator step.
Explosive ConsultationDestruction in DeadminesDestruction in Deadmines
Pick up Underground Assault from Shoni the Shilent in Stormwind before traveling to Moonbrook. Loot the Gnoam Sprecklesprocket from Sneed's Shredder and return it for a choice of Polar Gauntlets, Sable Wand, Bravo's Armbands or Dreamer's Leggings.
Alliance paladins following The Test of Righteousness should speak with Jordan Stilwell in Ironforge before the run. Bring Jordan's Weapon Notes and collect Whitestone Oak Lumber in the lumber room; the other weapon components require separate trips.
Horde paladins following A Moon-Kissed Blade also need Whitestone Oak Lumber. Speak with Trevan Rol in the Sepulcher and collect Trevan's Weapon Notes before traveling to Westfall, then gather the lumber during the run.
Collect Defias Gunpowder from the small side room before the cannon beyond the foundry. Keep it for the cannon that opens the iron door into Ironclad Cove; it serves a different purpose from the quest explosives planted at the forge.


The Deadmines
Follow the main mine passage to Rhahk'Zor and the guarded door. Clear his ranged escorts before finishing him, then continue through the doorway toward the side mine and lumber room.
Creatures
- Defias WatchmanLevel 16–18 Elite Humanoid
The Defias Watchmen beside Rhahk'Zor keep firing while his Slam stuns the tank. Bring them into the cleared passage and finish them before concentrating on Rhahk'Zor.

Shoot
Shoots at an enemy, inflicting Physical damage.
- Defias EvokerLevel 17–18 Elite Humanoid
Interrupt the Defias Evoker's Flamestrike and leave the burning area if it lands. Quick Flame Ward makes its recipient immune to Fire spells, so use physical attacks or another school against the protected enemy.

Flamestrike
Calls down a pillar of flame, burning all enemies in a selected area and inflicting additional damage every 2 sec. for 8 seconds.

Quick Flame Ward
Renders an ally immune to Fire spells for 10 seconds.
Rhahk'Zor's Slam stuns the tank while his ranged Watchmen continue firing.
Abilities

Rhahk'Zor Slam
Keep the tank healthy before the Slam; its damage and stun arrive together.
 Tank
- Pick up Rhahk'Zor and his Watchmen in the cleared mine passage. Plan mitigation before the Slam stuns you rather than relying on an action during the stun.
 Healer
- Keep the tank topped up for Rhahk'Zor Slam, especially while the Watchmen are still shooting. The stun prevents the tank from reacting to its damage.
 Damage
- Kill the Watchmen accompanying Rhahk'Zor first so their shots do not overlap the tank's Slam stun. Finish Rhahk'Zor before moving through the guarded doorway.
Loot


Lumber Room
Beyond Rhahk'Zor's door, check the left-hand mine tunnel for Miner Johnson before entering the lumber room. The side mine is optional. Clear the workroom before engaging Sneed's Shredder so Terrify cannot send a player into an untouched pack. After the machine falls, the tank must pick up Sneed before the group resumes damage.
Creatures
- Defias MagicianLevel 16–17 Elite Humanoid
Interrupt the Defias Magician's Fireball and defeat the caster before pulling the shredder. Summon Living Flame can add another enemy to a fight already complicated by Terrify.

Fireball
Inflicts Fire damage to an enemy.

Summon Living Flame
Summons 1 Living Flame to aid the caster in battle for 4 minutes.
Destroying Sneed's Shredder changes the fight from fear and slower spellcasting to a disarming pilot who needs a fresh tank pickup.
Abilities

Terrify
Terrifies an enemy, causing it to flee in fear for 4 seconds. Only 1 target can be terrified at a time.
Clear the lumber room before pulling so a feared player cannot run into another pack.

Distracting Pain
Reduces an enemy's casting speed by 35% for 15 seconds.
Allow for slower healing casts; avoid waiting until the tank is nearly dead to begin healing.
Eject Sneed
Let the tank acquire the emerging pilot before resuming burst damage.

Disarm
Disarms an enemy, forcing it to stop wielding its weapon for 6 seconds.
Use threat abilities that remain usable without a weapon while Sneed's Disarm is active.
- Tank
- Fight the shredder in the cleared lumber room. When it breaks, acquire Sneed immediately; use weapon-independent threat abilities during his Disarm.
- Healer
- Start heals earlier under Distracting Pain's casting slow. Watch the pilot transition, when healing can draw Sneed before the tank has acquired him.
- Damage
- Clear nearby workroom enemies before Terrify can scatter the group into them. Pause burst as the shredder falls and resume once the tank has Sneed. Loot the Gnoam Sprecklesprocket if you have Underground Assault.
Loot


Miner Johnson
Level 19 Elite HumanoidMiner Johnson's optional side-tunnel fight becomes dangerous when Pierce Armor overlaps damage from neighboring miners.
Abilities

Pierce Armor
Reduces an enemy's armor by 75% for 20 seconds.
Expect increased physical damage on the affected tank and avoid adding another mine pack during the debuff.
- Tank
- Clear space in the left-hand side mine before pulling Miner Johnson. Use mitigation during Pierce Armor and keep the fight separate from the remaining miners.
- Healer
- Watch for Pierce Armor rather than judging incoming damage from the opening swings. Keep healing focused on the tank while their armor is reduced.
- Damage
- Finish Miner Johnson before advancing into another side-mine pack while Pierce Armor is still on the tank. Return to the lumber-room route when the optional detour is complete.
Loot


Goblin Foundry
Clear a flank of the forge room before engaging Gilnid and his escorts. Give the tank room to fight without reaching neighboring workers while Molten Metal slows their movement. Place the quest explosives beside the forge before leaving, then collect the gunpowder and use the cannon on the iron door ahead.
Creatures
- Goblin CraftsmanLevel 18–19 Elite Humanoid
Goblin Craftsmen use Melt Ore against nearby players, dealing Fire damage and slowing movement. Keep ranged players back and finish these packs before pulling Gilnid, when an extra movement slow would make repositioning harder.
Melt Ore
Inflicts 140 Fire damage to nearby enemies and reduces their movement speed by 40% for 20 seconds.
Gilnid
<The Smelter>Level 20 Elite HumanoidGilnid's Molten Metal adds recurring Fire damage and slows attacks and movement in a foundry crowded with other enemies.
Abilities

Molten Metal
Keep the fight on cleared forge floor; the movement slow makes escaping an accidental extra pull harder.
- Tank
- Pull Gilnid and his escorts onto the cleared flank of the foundry. Molten Metal slows your movement and attacks, so avoid repositioning through untouched workers.
- Healer
- Account for Molten Metal's recurring Fire damage as well as Gilnid's melee attacks. Keep the tank stable while the escorts are being removed.
- Damage
- Defeat Gilnid's escorts before concentrating on him so their attacks do not overlap Molten Metal for the full fight. Afterward, place the demolition quest's explosives beside the forge before continuing to the cannon.
Loot


Ironclad Cove
Follow the docks to Mr. Smite at the boarding ramp before climbing the ship. Cookie is an optional lower-deck detour. Continue upward through Captain Greenskin, clearing his group before approaching Edwin VanCleef above. After VanCleef, leave through the passage behind the ship and meet Alba outside if you planted the forge explosives.
Creatures
- Defias SquallshaperLevel 19–20 Elite Humanoid
Defias Squallshapers can root nearby players with Frost Nova and damage them with Fire Blast. Keep ranged players away from the caster and avoid pulling the next deck while melee players are rooted behind the group.

Frost Nova
Fire Blast

Captain Greenskin's Cleave and Poisoned Harpoon punish a crowded tank position on the climb toward VanCleef.
Abilities

Cleave
Cleave also hits the tank's nearest ally; keep other players apart from the tank's position.

Poisoned Harpoon
Inflicts normal damage plus 30 to an enemy, then an additional 45 Nature damage every 10 sec. for 1 minute.
Remove the poison if your group can; otherwise heal its continuing Nature damage.
- Tank
- Bring Greenskin's group back onto cleared deck rather than fighting at VanCleef's approach. Keep other players away from your position so Cleave cannot catch a nearby ally.
- Healer
- Remove Poisoned Harpoon if you can dispel poison; otherwise keep healing its periodic damage. Stay apart from the tank to avoid becoming Cleave's second target.
- Damage
- Finish Greenskin's escorts before the captain, fighting apart from the tank's position. Clear this group completely before climbing toward VanCleef.
Loot


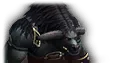
Mr. Smite's stomps and weapon changes interrupt the group before renewed melee pressure at the boarding ramp.
Abilities

Smite Stomp
Keep the tank healthy before the group is stunned and be ready when Smite returns from his weapon change.
Smite Slam
Inflicts 50 damage to an enemy, stunning it for 3 seconds.
Smite Slam damages and stuns its victim; prepare healing before the hit rather than after the tank drops low.

Thrash
Gives the caster 2 extra attacks.
Expect extra melee swings and use mitigation when Smite resumes attacking after a weapon change.

Nimble Reflexes
Increases the caster's chance to parry by 75% for 8 seconds.
Use spell damage during the parry buff and save melee burst until it ends.
- Tank
- Collect Smite and his escorts at the cleared ramp. Save mitigation for when he resumes swinging after changing weapons, when Thrash can add attacks, rather than spending it while he is away at the chest.
- Healer
- Keep the tank healthy before Smite Stomp prevents healing. Be ready to heal as the stun ends and Smite returns with changed weapons; Smite Slam can stun the tank again.
- Damage
- Remove Smite's initial escorts before concentrating on him. Continue spell damage during Nimble Reflexes, but hold melee burst until the parry buff ends.
Loot


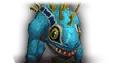
Cookie prolongs the lower-deck fight with Cookie's Cooking while Acid Splash damages nearby players.
Abilities

Cookie's Cooking
Interrupt Cookie's Cooking so the self-heal does not undo the group's damage.

Acid Splash
Keep ranged players back from Cookie to reduce the group exposed to Acid Splash.
- Tank
- Engage Cookie on cleared lower deck without drawing the groups above. Keep an interrupt available for Cookie's Cooking if your class can stop the cast.
- Healer
- Heal from outside Cookie's close-range Acid Splash and watch the players who remain near him. A completed Cooking cast extends the fight and its healing cost.
- Damage
- Assign an interrupt to Cookie's Cooking. Ranged damage should stay back from Acid Splash rather than joining the melee group around Cookie.
Loot



VanCleef's Allies brings new guards onto the upper deck while Thrash threatens the tank with extra attacks.
Abilities

VanCleef's Allies
The tank must catch the arriving guards; control the later wave while finishing VanCleef if the group can maintain control.
Thrash
Gives the caster 2 extra attacks.
Allow for extra melee attacks, especially while the tank is also handling the summoned guards.
- Tank
- Engage VanCleef only after Greenskin's group is cleared. Gather the initial guards and be ready to acquire the new ones summoned by VanCleef's Allies before they reach the healer.
- Healer
- Keep the tank stable through Thrash while watching the newly arriving guards. Call attention to a guard attacking you so the tank can collect it before another burst of melee attacks.
- Damage
- Kill VanCleef's initial guards first. Control the later guards while finishing VanCleef if the group can sustain that control; otherwise remove them before they overwhelm the tank. Avoid area damage that breaks the chosen control.
Loot


Loot


 WoW Forever dungeons up to level 30: which to run at your level and what to bring
 WoW Forever beta patch notes: October 1
 WoW Forever secrets and hidden quests: every discovery so far
 WoW Forever Wolf’s Bane: the Forsaken paladin’s level 20 weapon quest
 WoW Forever Rockslicer and Partners in Crime: items that break the rules
 WoW Forever item sources and crafting uses