 Azeroth DB
Ragefire Chasm (13 - 16)
Requires level 13Quests: level 12–1610 playersOrgrimmar 53.0, 48.9
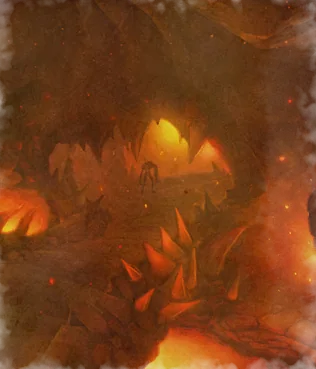
Horde groups can combine quests from Orgrimmar, Thunder Bluff and Undercity once Thrall's Hidden Enemies reaches its dungeon step. Up to 10 players can enter; the route visits Oggleflint's trogg cave, crosses the lava to Taragaman, and finishes with Jergosh and Bazzalan.


Preparation
Meet at the portal in Orgrimmar's Cleft of Shadow. The quest pickup route runs through Horde cities, so collect the Thunder Bluff and Undercity quests before assembling.
Collect Testing an Enemy's Strength from Rahauro in Thunder Bluff. It requires 8 Ragefire Troggs and 8 Ragefire Shamans; finish those objectives in the opening caves before moving into the Searing Blade camp.
Rahauro also offers Searching for the Lost Satchel in Thunder Bluff. Search Maur Grimtotem's corpse beside Oggleflint, accept Returning the Lost Satchel there, and take the Grimtotem Satchel back to Rahauro after the run.
Visit Varimathras in Undercity for The Power to Destroy... before travelling to Orgrimmar. Collect Spells of Shadow and Incantations from the Nether from Searing Blade Cultists and Searing Blade Warlocks, then return both books to Varimathras.
Accept Slaying the Beast from Neeru Fireblade in Orgrimmar's Cleft of Shadow before entering. Loot Taragaman the Hungerer's Heart after the platform fight and return it to Neeru Fireblade.
Start Hidden Enemies with Thrall before the run. Obtain the Lieutenant's Insignia in Skull Rock, complete the conversation with Neeru Fireblade and return to Thrall until the objective names Bazzalan and Jergosh the Invoker. After killing both, report to Thrall, speak to Neeru Fireblade again and return to Thrall for the weapon choice.
Hidden EnemiesHidden EnemiesHidden EnemiesHidden EnemiesHidden Enemies


Oggleflint's cave
Take the first right-hand branch through the trogg caves to Oggleflint. Stop the Ragefire Shamans' healing as you clear toward the chieftain. Complete the satchel interaction beside Oggleflint and check Testing an Enemy's Strength before returning to the main junction.
Creatures
- Ragefire ShamanLevel 13–15 Elite Humanoid
Healing Wave prolongs the trogg pulls. Save an interrupt for that heal and use additional interrupts on Lightning Bolt when incoming damage is high.

Healing Wave
Calls upon Nature magic to heal an ally.

Lightning Bolt
Blasts an enemy with lightning, inflicting Nature damage.
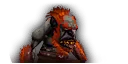
Oggleflint
<Ragefire Chieftain>Level 16 Elite HumanoidOggleflint's Cleave punishes players who crowd his melee target in the trogg side cave.
Abilities

Cleave
Leave space around Oggleflint's current target; Cleave also hits that player's nearest ally.
 Tank
- Hold Oggleflint on the cleared side of the cave and keep your position separate from the rest of melee for Cleave.
 Healer
- Stay out of the melee cluster and watch for Cleave damage on a second player as well as the tank.
 Damage
- Keep space between yourself and Oggleflint's current target instead of sharing the tank's position for Cleave.
Taragaman's platform
Return to the main passage and follow the solid paths across the lava to Taragaman's central platform. Clear the approach and the nearby Searing Blade patrols before engaging him. Leave solid ground behind the tank for Uppercut, and collect the heart for Slaying the Beast before continuing deeper.
Creatures
- EarthborerLevel 13–14 Elite Beast
Earthborer Acid stacks an armor reduction. Avoid combining Earthborers with other melee packs while that effect is reducing the tank's armor.

Earthborer Acid
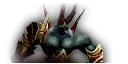
Taragaman the Hungerer
Level 16 Elite HumanoidTaragaman combines nearby Fire Nova damage with Uppercut knockback on a platform surrounded by lava.
Abilities

Fire Nova
Inflicts Fire damage to nearby enemies.
Keep players who do not need melee range away from Taragaman to limit Fire Nova damage. Melee can step back if the healer cannot cover the nearby damage.

Uppercut
Inflicts normal damage plus 50 to an enemy, knocking it back.
Keep the tank well inside the platform with solid ground behind them so the knockback does not send them into lava.
- Tank
- Position Taragaman away from the platform edge and leave cleared solid ground behind you for Uppercut.
- Healer
- Stand back from Fire Nova while keeping the tank's landing position in healing reach. Cover the tank after Uppercut and the nearby players after Fire Nova.
- Damage
- Ranged players should stay back from Fire Nova. Melee should step away if its damage overwhelms healing, without moving toward a lava edge.
Loot


Searing Blade camp
Continue beyond Taragaman into the Searing Blade camp. Clear the lower camp for Jergosh, then take the raised path to Bazzalan. Loot the Cultists and Warlocks for both books before leaving; Hidden Enemies requires both Jergosh and Bazzalan.
Creatures
- Searing Blade CultistLevel 13–15 Elite Humanoid
Curse of Agony adds periodic Shadow damage during the camp pulls. Remove the curse, if the group can, before adding more caster pressure from the Warlocks.

Curse of Agony
Curses an enemy with agony, inflicting Shadow damage every 3 sec. over 15 seconds. Only one curse per warlock can be active on any one target.
- Searing Blade EnforcerLevel 13–15 Elite Humanoid
Shield Slam can stun the player holding the Enforcer. Keep another player available to interrupt the Warlock during that stun.

Shield Slam
- Searing Blade WarlockLevel 13–15 Elite Humanoid
Interrupt Shadow Bolt and bring Warlocks back into cleared ground so the tank can reach them without crossing another pack.

Shadow Bolt
Hurls a bolt of dark magic at an enemy, inflicting Shadow damage.
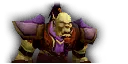
Jergosh the Invoker
Level 16 Elite HumanoidJergosh tests interrupts on Immolate and curse removal for physical attackers weakened by Curse of Weakness.
Abilities

Immolate
Burns an enemy, then inflicts additional Fire damage every 3 sec. for 21 seconds.
Interrupt Immolate to prevent its initial hit and continuing burn. If it lands, remove the harmful magic when possible or heal through the remaining damage.

Curse of Weakness
Remove Curse of Weakness from physical attackers when possible; its damage penalty applies to Physical damage.
- Tank
- Bring Jergosh to cleared ground at the camp's edge and keep him in reach of the players interrupting Immolate.
- Healer
- Remove Immolate if your class can dispel harmful magic; otherwise cover its continuing burn. Curse of Weakness requires curse removal rather than a magic dispel.
- Damage
- Reserve an interrupt for Immolate. Physical attackers should call for Curse of Weakness removal instead of continuing the fight with reduced damage.
Loot


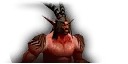
Bazzalan
Level 16 Elite HumanoidBazzalan combines Sinister Strike with Deadly Poison, leaving his target taking damage between direct hits at the end of Hidden Enemies.
Abilities

Sinister Strike
Let the tank establish Bazzalan before attacking; Sinister Strike adds a weapon hit while poison damage is also running.

Deadly Poison
Target takes 6 Nature damage every 3 seconds.
Remove Deadly Poison when possible and keep healing its target while the effect remains.
- Tank
- Establish Bazzalan on cleared ground at his raised position before the group attacks, so Sinister Strike and Deadly Poison stay on the intended target.
- Healer
- Watch the tank between Sinister Strike hits because Deadly Poison continues dealing damage. Cure the poison if your class can remove it.
- Damage
- Give the tank time to establish Bazzalan before committing damage. If your class removes poison, use it on Bazzalan's target rather than leaving every Deadly Poison tick to the healer.
Loot


 WoW Forever dungeons up to level 30: which to run at your level and what to bring
 WoW Forever beta patch notes: October 1