 Azeroth DB
Shadowfang Keep (18 - 26)
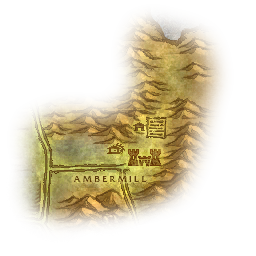
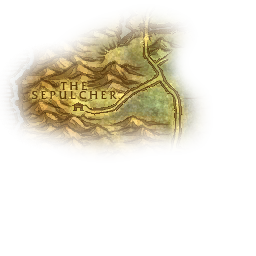
Requires level 18Quests: level 22–2710 playersSilverpine Forest 44.7, 67.8
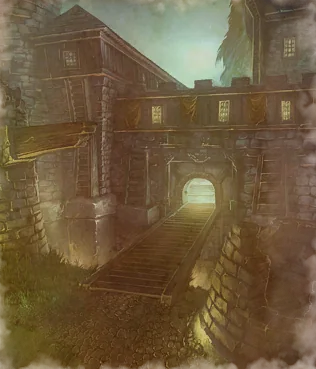
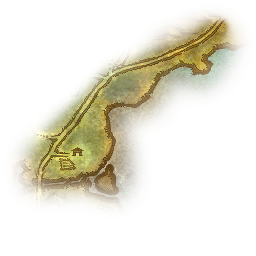
Bring a group of up to 10 for the Sepulcher's dungeon quests, class-weapon materials, or a full climb to Archmage Arugal. Rethilgore's prison gates the courtyard; the run then crosses the dining hall and battlements before ending in Arugal's tower.
















Preparation
Horde: collect Deathstalkers in Shadowfang from High Executor Hadrec at the Sepulcher before entering. Check the prison and courtyard for the missing scouts before proceeding upstairs. The reward choices are Ghostly Mantle, Tanned Shoulderpads, and Bronzed Shoulderguards.
Horde: take Arugal Must Die from Dalar Dawnweaver at the Sepulcher before travelling to the keep. Its objective requires reaching Archmage Arugal at the end of the run; the reward is Seal of Sylvanas.
Horde: take The Book of Ur from Keeper Bel'dugur in the Undercity Apothecarium. Collect The Book of Ur from the shelves in Fenrus's chamber before continuing up the tower. The reward choices are Grizzled Boots, Steel-clasped Bracers, and Tattered Mittens.
Alliance paladins: accept The Test of Righteousness from Jordan Stilwell at Ironforge before coming for Jordan's Smithing Hammer. Keep the quest active while collecting its other materials on separate trips; the hammer alone does not complete the objective.
Warlocks of either faction: accept The Orb of Soran'ruk from Doan Karhan in the Barrens. Shadowfang Keep supplies the Large Soran'ruk Fragment; the three smaller Soran'ruk Fragments belong to the Blackfathom Deeps part of the job. Return the fragments for a choice of Orb of Soran'ruk or Staff of Soran'ruk.
If you have The Horn of Xelthos, plan a separate solo visit. Recover Horn of Xelthos and return it to the dead drop near Pyrewood Village; a grouped run does not satisfy the quest's instruction to complete the job alone.


Prison cells and courtyard
Clear the Bleak Worgs around Rethilgore before committing to the cell keeper. After defeating him, free Deathstalker Adamant for Horde or Sorcerer Ashcrombe for Alliance and ask the prisoner to open the courtyard gate. Check the courtyard for the Deathstalkers in Shadowfang objective before heading into the keep.
Creatures
- Bleak WorgLevel 18–19 Elite Beast
Bleak Worgs slow attacks, casting, and movement with Wavering Will. Finish them before Rethilgore so a slowed healer is not also trying to support a rooted Soul Drain victim.

Wavering Will
Increases the time between an enemy's attacks speed by 25%, slows its casting speed by 20%, and slows its movement by 20%. Lasts 1 minute.
Clear Wavering Will from a healer if you can remove harmful magic; its casting slow makes the prison pull harder to recover.
Rethilgore
<The Cell Keeper>Level 20 Elite HumanoidRethilgore tests whether the group can support a Soul Drain victim without the prison's worgs overwhelming the healer.
Abilities

Soul Drain
Immobilizes an enemy for 10 seconds. and drains 35 health, transferring it to the caster.
Soul Drain takes health and immobilizes its victim. Heal the lost health and remove the magic root when the victim needs to move.
 Tank
- Secure the nearby Bleak Worgs before committing to Rethilgore so Soul Drain's root cannot leave them attacking a slowed healer.
 Healer
- Watch Soul Drain's victim rather than assuming every hit lands on the tank; remove the magic root if it prevents that player from reaching safety or healing range.
 Damage
- Finish the Bleak Worgs before focusing Rethilgore so Wavering Will is not slowing the healer during Soul Drain. Remove a rooted healer's harmful magic if your class can.
Loot


Stables and dining hall
Cross the courtyard to the kitchen for Razorclaw, then continue into the dining hall for Silverlaine. The stables are a side pull: prepare crowd control before engaging the Fel Steeds and Shadow Charger together. Clear the dining room around Silverlaine before pulling him so Veil of Shadow does not coincide with a second pack.
Creatures
- Fel SteedLevel 19–20 Elite Beast
Fel Stomp stuns nearby players and increases the Physical damage they take. Control the other stable horses while focusing a Fel Steed, and keep the healer away from the horse being tanked.

Fel Stomp
Keep players who are not tanking the horse outside its nearby stomp, especially while other horses can attack the stunned victim.
- Shadow ChargerLevel 20–21 Elite Beast
The Shadow Charger joins the linked stable pull. Hold it separately or control it while the Fel Steeds are killed so their stomp does not leave one player taking the whole horse pack's attacks.
Razorclaw the Butcher
Level 22 Elite HumanoidRazorclaw punishes a mana user who takes his attacks because Butcher Drain removes the resource they need to keep fighting.
Abilities

Butcher Drain
Butcher Drain removes mana from its victim. Mana-using damage dealers and healers should avoid taking Razorclaw's attacks.
- Tank
- Keep Razorclaw's attacks on you. If you tank with mana, reserve enough for threat abilities while Butcher Drain is removing it.
- Healer
- Stay out of Razorclaw's melee reach so an accidental target change does not drain the mana needed to heal the kitchen pull.
- Damage
- Let the tank establish Razorclaw's attention before attacking; taking threat is especially costly for a caster because Butcher Drain removes mana.
Loot



Baron Silverlaine
Level 24 Elite UndeadSilverlaine tests curse removal because Veil of Shadow sharply reduces the healing his victim receives.
Abilities

Veil of Shadow
Reduces healing effects for an enemy by 75% for 15 seconds.
Remove Veil of Shadow as a curse. Its 75% healing reduction makes trying to heal through it expensive and dangerous.
- Tank
- Use a defensive ability while Veil of Shadow remains on you instead of expecting the healer's usual recovery from each cast.
- Healer
- Call for curse removal as soon as Veil of Shadow lands; ordinary healing has much less effect until the curse is cleared.
- Damage
- If you can remove curses, clear Veil of Shadow from Silverlaine's victim before resuming attacks.
Loot


Chapel
Continue from the dining hall into Springvale's chapel. Pull the surrounding Wailing Guardsmen away from the room before engaging Springvale and his attendants. Keep a Guardsman away from the healer so its silence does not cover Springvale's healing casts.
Creatures
- Wailing GuardsmanLevel 21–22 Elite Undead
Screams of the Past silences nearby players. Fight a Wailing Guardsman away from the healer rather than stacking the party around Springvale's attendants.

Screams of the Past
Silences nearby enemies, preventing them from casting spells for 5 seconds.
Keep healers and spell interrupters away from the Guardsman when Screams of the Past can silence them.

Commander Springvale
Level 24 Elite UndeadSpringvale combines Holy Light with stuns while his Wailing Guardsman's silence threatens the group's healing and interrupts.
Abilities

Holy Light
Reserve an interrupt for Holy Light whenever Springvale is vulnerable to it, rather than allowing him to recover the damage already dealt.

Hammer of Justice
Stuns the target for 4 seconds.
Hammer of Justice stuns its victim. Keep that player healthy while they cannot act, and have another player cover a needed Holy Light interrupt.

Divine Shield
Protects the paladin from all damage and spells for 10 seconds, but reduces all damage you deal by 50%. Applies Forbearance for 1 minute. Cannot be cast while Forbearance is active.
Divine Shield protects Springvale from damage and spells. Preserve damaging casts and interrupts for when the shield ends.
- Tank
- Hold Springvale where the healer can stay away from the Wailing Guardsman's Screams of the Past; keep an interrupt available for Holy Light.
- Healer
- Keep away from the Guardsman's silence and watch Springvale's Hammer of Justice victim while they cannot act.
- Damage
- Finish the Haunted Servitor first and help separate the Wailing Guardsman from the healer. Save an interrupt for Holy Light rather than spending it into Divine Shield.
Loot


Battlements
Climb from the chapel toward the battlements and approach Odo with room to separate the bats' victim from other players. Take Odo and his Vile Bats as one fight, but finish the bats before Howling Rage strengthens their attacks along with his.
Creatures
- Vile BatLevel 22–23 Elite Beast
Diving Sweep hits the bat's victim and nearby allies. Keep other players away from that victim, and kill the bats before Odo's Howling Rage makes their melee attacks more dangerous.

Diving Sweep
Inflicts normal damage plus 30 to an enemy and its nearest allies, affecting up to 3 targets.
Separate the bat's victim from nearby allies rather than clustering every melee player around it.
Odo the Blindwatcher
Level 24 Elite HumanoidOdo rewards killing the Vile Bats before Howling Rage increases their Physical damage along with his.
Abilities

Howling Rage
Howling Rage strengthens Odo and nearby bats. Finish the bats first and save tank defenses for the stronger casts later in the fight.
- Tank
- Hold Odo and his Vile Bats together long enough for the group to finish the bats, then use defenses as Howling Rage raises Odo's melee damage.
- Healer
- Budget mana for the later Howling Rage casts; Odo's victim needs more healing after those increases than during the opening bat kills.
- Damage
- Kill the Vile Bats before Odo so Howling Rage does not leave several strengthened attackers alive. Use offensive cooldowns to shorten his stronger melee phase.
Loot


Arugal's tower
Follow the upper passages through Fenrus's chamber, Nandos's kennel, and Arugal's room. Collect The Book of Ur before leaving Fenrus's shelves behind, and finish any Arugal's Voidwalkers before advancing. Clear the worgs around Nandos before pulling him. Clear the worgen in Arugal's room before starting the teleporting fight.
Creatures
- Arugal's VoidwalkerLevel 24–25 Demon
Arugal's Voidwalkers can heal one another with Dark Offering. Concentrate damage on one at a time and stop their healing casts rather than spreading damage across the pack.

Dark Offering
Stop Dark Offering or concentrate damage on its recipient so the heal does not undo damage spread across several Voidwalkers.
- Lupine HorrorLevel 24 Elite Undead
A Lupine Horror can summon Lupine Delusions. Focus the Horror instead of leaving it free to multiply the enemies in Nandos's room.

Summon Lupine Delusions
Summons 2 Lupine Delusions to aid the caster in battle for 4 minutes.
Control or finish the Lupine Horror before repeated summons add more Lupine Delusions to the fight.
Fenrus the Devourer
Level 25 Elite BeastFenrus tests poison removal because Toxic Saliva drains mana as well as health during the melee fight.
Abilities

Toxic Saliva
Inflicts 17 Nature damage to an enemy every 6 sec. Also drains 20 mana every 6 sec., transferring it to the caster. Lasts 2 minutes.
Remove Toxic Saliva as a poison. Leaving it active costs mana as well as health, even after Fenrus is defeated.
- Tank
- Keep Fenrus's attacks on you so the healer does not have to take his melee damage while also managing Toxic Saliva.
- Healer
- Remove Toxic Saliva promptly, particularly from a mana user; healing its damage alone leaves the mana drain running into the next pull.
- Damage
- Remove Toxic Saliva if your class can cure poison. After Fenrus falls, finish any Arugal's Voidwalkers before advancing, focusing one so Dark Offering cannot sustain the pack.
Loot


Wolf Master Nandos
Level 25 Elite HumanoidNandos tests whether the group can collect his called worgs before the summons reach the healer or multiply into Lupine Delusions.
Abilities

Call Bleak Worg
Summons 1 Bleak Worg to aid the caster in battle for 4 minutes.
Collect the called Bleak Worg before its Wavering Will slows the healer, then finish it before returning to Nandos.
Call Slavering Worg
Summons 1 Slavering Worg to aid the caster in battle for 4 minutes.
Switch damage to the called Slavering Worg while the tank keeps Nandos occupied; leaving each new worg alive increases pressure on the healer.
Call Lupine Horror
Summons 1 Lupine Horror to aid the caster in battle for 4 minutes.
Focus the called Lupine Horror before Summon Lupine Delusions adds more enemies to the fight.
- Tank
- Be ready to collect a fresh worg after each of Nandos's calls rather than spending every threat ability on Nandos alone.
- Healer
- Stay near the player collecting Nandos's summons so a called worg can be taken off you without crossing the kennel.
- Damage
- Break off Nandos for the worg he calls; prioritize a Lupine Horror that can create Lupine Delusions.
Loot


Archmage Arugal
Level 26 Elite HumanoidArugal tests healing range across teleports while the group controls a player transformed by Arugal's Curse.
Abilities

Void Bolt
Keep Void Bolt's target in healing range when Arugal changes position; repeated Shadow hits can land while the group is moving.

Thundershock
Keep ranged players away from Arugal so Thundershock's nearby Nature damage and stun do not also stop their healing and attacks.
Arugal's Curse
Transforms an enemy into a Shadowfang Glutton, enslaving it to the caster's will for 10 seconds.
Control the charmed ally without killing them, then return to Arugal when the control ends.

Shadow Port
Re-establish range and line of sight after Shadow Port. Follow Arugal along the cleared route rather than chasing him through remaining worgen.
- Tank
- Reach Arugal again after Shadow Port without leaving healing range. Keep a charmed party member controlled rather than treating them as another enemy to kill.
- Healer
- Heal the current Void Bolt target from outside Thundershock's nearby area, and regain line of sight after each Shadow Port.
- Damage
- Move back into attack range after Shadow Port. Stop attacks on an ally changed by Arugal's Curse and use crowd control instead.
Loot


Loot


 WoW Forever dungeons up to level 30: which to run at your level and what to bring
 WoW Forever beta patch notes: October 1
 WoW Forever secrets and hidden quests: every discovery so far
 WoW Forever Wolf’s Bane: the Forsaken paladin’s level 20 weapon quest
 Coldflame Saber in WoW Forever: Scroll of the Saber and the battle mage