 Azeroth DB
Wailing Caverns (17 - 22)
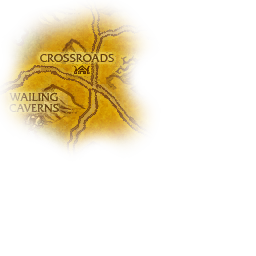
Requires level 17Quests: level 13–2610 playersThe Barrens 47.7, 35.0
Run Wailing Caverns while completing its Barrens and Ratchet quests, with additional Thunder Bluff quests for Horde players. A group of up to 10 players follows branching passages to defeat the Fanglords, then returns to the entrance for the Disciple of Naralex. The full run ends with the awakening ritual and Mutanus the Devourer, not with Verdan on the upper ledge.













Preparation
Both factions can collect Trouble at the Docks in Ratchet. Search the outer caves for Mad Magglish and recover the 99-Year-Old Port before crossing the instance portal.
In Ratchet, finish Raptor Horns by delivering the Intact Raptor Horns before accepting Smart Drinks. Collect six Wailing Essence from ectoplasms during the cavern clear.
Before entering, visit the cave above the main cavern entrance for Deviate Hides. Gather 20 Deviate Hides during the approach and dungeon clear; the rewards include the Deviate Hide Pack and Slick Deviate Leggings. This pickup is available to both factions.
Collect Deviate Eradication in the same cave above the entrance. Check its requested kills before leaving each branch, rather than returning through cleared passages for missed creatures. One reward choice is Pattern: Deviate Scale Belt. The other choices are Sizzle Stick and Dagmire Gauntlets, and both factions can take this quest.
Horde players should collect Leaders of the Fang in Thunder Bluff before travelling to the instance. If it is not offered, continue the oasis investigations at the Crossroads and their Thunder Bluff follow-up first. Loot the Gem of Anacondra, Gem of Cobrahn, Gem of Pythas and Gem of Serpentis during the run. At turn-in, choose Crescent Staff, Wingblade or Hammerbone.
The Forgotten PoolsThe Stagnant OasisAltered BeingsHamuul RunetotemLeaders of the Fang
Horde players can also collect Serpentbloom in Thunder Bluff. Gather 10 Serpentbloom while clearing the caves. The reward choices are Apothecary Gloves, Heat Resistant Mitts and Safety Boots.
Include the awakening ritual when arranging a run for The Glowing Shard. After defeating Mutanus, look for the Glowing Shard and use it to begin the quest, then take it to Ratchet for the next instructions.


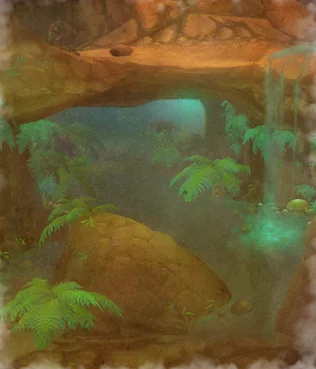
Entrance cavern
Pass the Disciple of Naralex at the entrance and clear into the first large cavern. Find Lady Anacondra before committing to either branch. Defeat nearby Druid of the Fang pulls separately where possible so their slumber and healing casts do not overlap Anacondra's Sleep.
Creatures
- Druid of the FangLevel 19–20 Elite Humanoid
Druid's Slumber can remove the healer from a pull while Healing Touch restores an enemy. Assign an interrupt to slumber first and stop the heal with another interrupt; Lightning Bolt is the next cast to stop once those are covered.

Druid's Slumber
Puts the enemy target to sleep for up to 15 seconds. Any hostile action will awaken the target. Only one target can be slept at a time.

Healing Touch

Lightning Bolt
Blasts an enemy with lightning, inflicting Nature damage.
- Deviate RavagerLevel 18–19 Elite Beast
Thrash gives a Deviate Ravager extra attacks. Pull ravagers away from sleeping or healing druids so the tank does not take the attack burst while the healer is disabled.

Thrash
Gives the caster 2 extra attacks.
Lady Anacondra
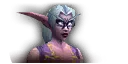
<Fanglord>Level 20 Elite HumanoidAnacondra combines Sleep and Healing Touch with Thorns Aura, so stopping casts must not distract the healer from melee retaliation damage.
Abilities
Sleep
Puts the enemy target to sleep for up to 20 seconds. Any damage caused will awaken the target. Only one target can be asleep at a time.
Interrupt Sleep before it disables the healer or an interrupt user; remove the magical sleep if it lands.
Healing Touch
Stop Healing Touch with a separate interrupt when possible, preserving the player assigned to Sleep.
Lightning Bolt
Blasts an enemy with lightning, inflicting Nature damage.
Interrupt Lightning Bolt after Sleep and Healing Touch have coverage to reduce Nature damage on its target.

Thorns Aura
Melee hits cause Nature retaliation. Include melee attackers in healing rather than watching the tank alone.
 Tank
- Keep Anacondra separate from nearby Druids of the Fang so Druid's Slumber does not overlap the boss's Sleep. Use spare interrupts on Lightning Bolt while the assigned players cover Sleep and Healing Touch.
 Healer
- Watch melee attackers for Thorns Aura damage alongside the tank. Clear Sleep from another healer or the assigned interrupt user when your spells allow it.
 Damage
- Give Sleep and Healing Touch different interrupt assignments. Melee attackers should watch their health under Thorns Aura instead of assuming every hit only hurts Anacondra.
Loot


Cobrahn's branch and the stream
From the first cavern, follow the western branch up to Lord Cobrahn. Clear the Deviate Pythons with the boss and collect the gem before retracing the branch to the stream. Find Kresh on the river patrol and pull the turtle onto a cleared bank instead of following it into another pack.
Creatures
- Deviate PythonLevel 18–19 Beast
The Deviate Pythons beside Cobrahn need to be collected with the boss. Remove them before concentrating damage on Cobrahn so they are not still attacking the healer when Druid's Slumber lands.
- Deviate ViperLevel 20 Elite Beast
Localized Toxin continues dealing Nature damage after a Deviate Viper is dead. Remove the poison when possible before taking another river pull, especially if the healer is also recovering from slumber.

Localized Toxin
Lord Cobrahn
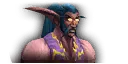
<Fanglord>Level 20 Elite HumanoidCobrahn's nearby pythons, Druid's Slumber and serpent transformation make the pull a test of add control before the tank's damage intake changes.
Abilities
Druid's Slumber
Puts the enemy target to sleep for up to 15 seconds. Any hostile action will awaken the target. Only one target can be slept at a time.
Interrupt Druid's Slumber; have a player able to remove magical sleep ready if it reaches the healer.

Cobrahn Serpent Form
Shapeshifts into a serpent for 5 minutes, increasing attack damage by 50, and increasing the time between attacks by 43%.
Cobrahn Serpent Form increases attack damage and lengthens the interval between attacks. Respond to the transformation with tank defenses and healing rather than relying on a health threshold.
Poison
Inflicts Nature damage to an enemy every 3 sec. for 30 seconds.
Remove Poison when possible so its continuing Nature damage does not overlap serpent-form hits for longer than necessary.
Healing Touch
Interrupt Healing Touch when another player can still stop Druid's Slumber.
Lightning Bolt
Blasts an enemy with lightning, inflicting Nature damage.
Stop Lightning Bolt with spare interrupts while preserving coverage for slumber and healing.
- Tank
- Collect the Deviate Pythons with Cobrahn so they cannot keep attacking the healer during Druid's Slumber. Use physical defenses when Cobrahn Serpent Form appears.
- Healer
- Keep healing resources for Cobrahn's transformation. Remove Poison and another player's Druid's Slumber when your spells permit, without leaving the transformed boss's target unsupported.
- Damage
- Finish the Deviate Pythons before concentrating on Cobrahn. Cover Druid's Slumber and Healing Touch separately, then use spare interrupts on Lightning Bolt.
Loot


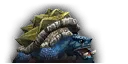
Kresh
Level 20 Elite BeastKresh patrols the stream, making the bank and nearby uncleared packs the main decisions in this optional turtle pull.
- Tank
- Wait for Kresh to reach a cleared stretch of the stream, then bring the turtle to the bank. Do not chase the river patrol into the next pack.
- Healer
- Take a position on the same cleared bank as the tank so the stream's bends and rocks do not put the fight out of sight.
- Damage
- Let the tank separate Kresh from the river patrol route before attacking. Keep area attacks away from untouched creatures on the opposite bank.
Loot


Eastern tunnels
Return to the main cavern and take the eastern route toward Lord Pythas. Control the Druid of the Fang in the mixed pull while collecting Pythas and the Deviate Shambler. Continue through the winding passages to Skum, using the wider part of the chamber to separate players for Chained Bolt.
Creatures
- Druid of the FangLevel 19–20 Elite Humanoid
The Druid of the Fang beside Pythas has its own Druid's Slumber and Healing Touch. Crowd control it or give its casts a separate interrupt assignment from Pythas's Sleep and healing.
Druid's Slumber
Puts the enemy target to sleep for up to 15 seconds. Any hostile action will awaken the target. Only one target can be slept at a time.
Healing Touch
- Deviate ShamblerLevel 19–20 Elite Elemental
Wild Regeneration heals the Deviate Shambler over time. Interrupt the cast before the effect starts; if it lands, remove the magical effect when possible rather than splitting damage while it heals.

Wild Regeneration
- Deviate DreadfangLevel 20–21 Elite Beast
A Deviate Dreadfang's Terrify sends a player running through the tunnels. Pull it back into cleared ground so the fleeing player is less likely to reach an untouched pack; remove the fear when possible.

Terrify
Terrifies an enemy, causing it to flee in fear for 4 seconds. Only 1 target can be terrified at a time.
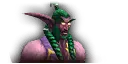
Lord Pythas
<Fanglord>Level 21 Elite HumanoidPythas's nearby Thunderclap adds an attack and movement slow to a mixed pull whose druid and boss can both disable healing with sleep.
Abilities
Sleep
Puts the enemy target to sleep for up to 20 seconds. Any damage caused will awaken the target. Only one target can be asleep at a time.
Interrupt Pythas's Sleep while another player controls or interrupts the accompanying Druid of the Fang.
Healing Touch
Stop Healing Touch without leaving both Pythas and the accompanying druid free to cast sleep.

Thunderclap
Thunderclap damages nearby players and slows attacks and movement. Ranged damage dealers and the healer should remain outside the close group; do not assign a cast interrupt to this instant ability.
Lightning Bolt
Blasts an enemy with lightning, inflicting Nature damage.
Interrupt Lightning Bolt after the boss's Sleep, healing and the accompanying druid are covered.
- Tank
- Collect Pythas and the Deviate Shambler while the Druid of the Fang is controlled. Establish the fight in cleared space before Thunderclap slows movement.
- Healer
- Heal from outside the nearby Thunderclap area. Arrange who removes Sleep if Pythas or the accompanying druid disables you while the tank has both other enemies.
- Damage
- Control the Druid of the Fang or give its slumber and healing a separate interrupt assignment. Stop Pythas's Sleep and Healing Touch; ranged players should not stand in the melee group for Thunderclap.
Loot


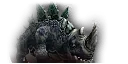
Skum
Level 21 Elite BeastSkum's Chained Bolt punishes a group clustered around the tank by carrying Nature damage to nearby players.
Abilities

Chained Bolt
Interrupt Chained Bolt and leave space between players so a completed cast has fewer nearby targets to reach.
- Tank
- Bring Skum into cleared space where ranged players can spread rather than stacking in a tunnel. Interrupt Chained Bolt when an interrupt is available.
- Healer
- Stand apart from the melee group and recover everyone hit by a completed Chained Bolt, rather than treating each cast as tank-only damage.
- Damage
- Stop Chained Bolt casts. Ranged players should leave a gap from the tank and melee attackers instead of becoming the next nearby target.
Loot


Upper ledges
After Skum, follow the climbing passage toward Serpentis and cross the gap together. Wait for everyone to land before pulling again. Pull Lord Serpentis separately from Verdan the Everliving, collect the last Fanglord gem, then clear space for Verdan. Once both fights are finished, return along the cleared route to the Disciple at the entrance.
Creatures
- Druid of the FangLevel 19–20 Elite Humanoid
Finish Druid of the Fang pulls before the group separates at a ledge. A slumbered healer cannot support players who have already crossed, and an unchecked Healing Touch prolongs the fight on the narrow path.
Druid's Slumber
Puts the enemy target to sleep for up to 15 seconds. Any hostile action will awaken the target. Only one target can be slept at a time.
Healing Touch
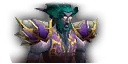
Lord Serpentis
<Fanglord>Level 21 Elite HumanoidSerpentis must be separated from nearby Verdan while the group covers Sleep and Healing Touch on the upper ledge.
Abilities
Sleep
Puts the enemy target to sleep for up to 20 seconds. Any damage caused will awaken the target. Only one target can be asleep at a time.
Interrupt Sleep and remove the magical effect if it reaches a healer or interrupt user.
Healing Touch
Reserve a separate interrupt for Serpentis's Healing Touch so the fight does not recover while the Sleep interrupt is unavailable.
Lightning Bolt
Blasts an enemy with lightning, inflicting Nature damage.
Reduce Lightning Bolt damage with spare interrupts after Sleep and Healing Touch have coverage.
- Tank
- Pull Serpentis away from Verdan before the group attacks. Keep the fight on cleared ground and use spare interrupts on Lightning Bolt while Sleep and Healing Touch are covered.
- Healer
- Clear Sleep from another healer or an interrupt user when possible. Keep the tank in sight without moving into Verdan's pull while responding to Lightning Bolt.
- Damage
- Cover Sleep and Healing Touch with different interrupts. Keep cleaves, pets and area damage off Verdan until Serpentis is dead and the tank starts the next pull.
Loot


Verdan the Everliving
Level 21 Elite ElementalVerdan's Grasping Vines knocks down and roots nearby players, so the tank's position must be settled before the group loses movement.
Abilities

Grasping Vines
Inflicts Physical damage to nearby enemies, knocking them down and immobilizing them for 10 seconds.
Keep ranged players outside the nearby vine area. If immobilization prevents needed movement, remove the magical root when possible; do not rely on an interrupt to handle the knockdown.
- Tank
- Finish Serpentis and clear the fight space before engaging Verdan. Place Verdan there before Grasping Vines can immobilize you beside another enemy.
- Healer
- Remain outside the nearby Grasping Vines area so its knockdown does not stop your tank healing. Remove the root from a player who needs to reposition when your spells permit.
- Damage
- Ranged players should attack from outside the vine area. Melee players should wait for Verdan to reach the cleared fight space before closing, rather than being rooted along the pull route.
Loot


Awakening ritual
After Anacondra, Cobrahn, Pythas and Serpentis are defeated, regroup at the entrance and speak to the Disciple of Naralex. Restore health and mana before starting the escort. Stay with the Disciple through the ambushes and defend the ritual against the snakes and ectoplasms; Mutanus appears at the end. Keep the group at the ritual until the event finishes, then collect the Glowing Shard if it drops.
Creatures
- Deviate MoccasinLevel 20–21 Elite Beast
Collect the Deviate Moccasins as they approach the Disciple during the awakening. Keep them on the tank so damage dealers can finish the wave without leaving a snake attacking the escort.
- Nightmare EctoplasmLevel 20–21
The Nightmare Ectoplasm wave arrives at the ritual. Gather the ectoplasms before spreading area damage, and check the Disciple for a straggler before preparing for Mutanus.
Mutanus the Devourer
Level 22 Elite HumanoidMutanus combines Naralex's Nightmare and Terrify with a nearby Thundercrack stun, testing whether the group can restore control without leaving the ritual exposed.
Abilities
Naralex's Nightmare
Puts the enemy target to sleep for up to 15 seconds. Any hostile action will awaken the target. Only one target can be slept at a time.
Stop Naralex's Nightmare before it disables the healer. If it lands, remove the magical sleep when possible rather than waiting for damage to wake the target.
Terrify
Terrifies an enemy, causing it to flee in fear for 4 seconds. Only 1 target can be terrified at a time.
Use fear prevention or removal when available. Return to the cleared fight position after Terrify instead of drawing Mutanus toward the Disciple.
Thundercrack
Thundercrack inflicts nearby Nature damage and a stun without a cast to interrupt. Keep ranged players outside the close group and maintain their health before a stun prevents recovery.
- Tank
- Engage Mutanus away from the Disciple of Naralex. Recover the cleared fight position after Terrify so the boss does not remain beside the escort during the ritual.
- Healer
- Keep the group healthy enough to recover from Thundercrack's damage and stun. Agree who can remove Naralex's Nightmare if you are asleep, and clear it from other healers when you can act.
- Damage
- Ranged players should stay outside Thundercrack's close area. Preserve an interrupt for Naralex's Nightmare and help remove sleep or fear when your class can do so.
Loot


Loot


 WoW Forever dungeons up to level 30: which to run at your level and what to bring
 WoW Forever beta patch notes: October 1
 WoW Forever secrets and hidden quests: every discovery so far
 WoW Forever druid serpent form: how to unlock it in Wailing Caverns