 Azeroth DB
Scholomance (57 - 62)
Requires level 575 playersWestern Plaguelands 69.1, 73.0
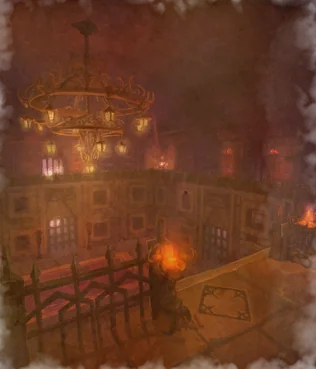
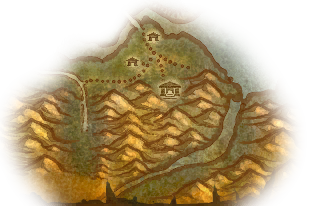
Scholomance is a five-player equipment run through the school beneath Caer Darrow. Arrange the optional summons before entering, then work through the crypt, ossuary and laboratory. Defeating the teachers around the Headmaster's Study opens the final fight with Darkmaster Gandling.











Preparation
Arrange for someone to bring the Skeleton Key to open the entrance on Caer Darrow. Alliance and Horde use the same entrance.
Reserve Blood of Innocents for Kirtonos's porch brazier if the group wants this optional encounter. Gather everyone inside the porch before activating it, because the gate closes.
Plan to loot the Viewing Room Key from Rattlegore before leaving the ossuary. It opens the classroom on the route deeper into Scholomance.
Bring Dawn's Gambit if the group intends to fight the Viewing Room encounters. It transforms the students into weaker skeletons; use it before attacking Marduk Blackpool or Vectus.
Bring a Brazier of Invocation if the group intends to summon Kormok in the laboratory. Kormok is an optional summon, not a boss activated by walking into the room.


Reliquary and porch
Clear the entrance classrooms and the Chamber of Summoning on the way to the porch. If the group has Blood of Innocents, gather inside before using Kirtonos's brazier. Fight against solid stone rather than the open windows, where Wing Flap can throw a player out of the instance.
Creatures
- Blood Steward of KirtonosLevel 61 Elite Demon
Blood Steward of Kirtonos can disable a player with Paralyzing Poison. Remove the poison promptly if it catches the healer; clear Curse of Weakness from a weapon attacker and Curse of Impotence from a spell attacker when possible.

Paralyzing Poison
Stuns an enemy, rendering it unable to move or attack for 8 seconds.

Curse of Weakness

Curse of Impotence
- Scholomance Dark SummonerLevel 58–59 Elite Humanoid
Scholomance Dark Summoners recover health through Drain Life. Interrupt the channel instead of trying to overcome its healing while more summoned attackers accumulate.

Drain Life
Kirtonos
Kirtonos the HeraldLevel 60 Elite UndeadKirtonos tests whether the group can keep a frontal stun and knockback away from the porch windows while recovering from curses and mind control.
Abilities

Wing Flap
Strikes enemies in a cone in front of the caster, knocking them back.
Put solid stone behind the tank and keep everyone else out of Kirtonos's front; Wing Flap can throw a player through a window.

Swoop
Swoop damages and stuns enemies in front. Attack from the flank or rear rather than sharing the tank's position.

Curse of Tongues
Forces nearby enemies to speak in Demonic, reducing their casting speed by 50% for 15 seconds. Only one curse per warlock can be active on any one target.
Remove Curse of Tongues from the healer first when its casting penalty threatens healing, then from other casters.

Dominate Mind
Use crowd control on a dominated teammate without killing them, and resume the boss fight when control ends or is removed.

Disarm
Disarms an enemy, forcing it to stop wielding its weapon for 10 seconds.
Weapon attackers lose their weapon during Disarm. Avoid committing a weapon-dependent burst into that debuff.

Pierce Armor
Reduces an enemy's armor by 50% for 20 seconds.
Pierce Armor weakens the target's protection against melee damage. Use mitigation and prioritize healing that target while the armor penalty is active.

Shadow Bolt Volley
Hurls missiles of dark magic, inflicting Shadow damage to nearby enemies.
Expect Shadow damage beyond the tank from Shadow Bolt Volley; do not let the porch positioning put the rest of the group out of healing reach.
 Tank
- Fight with solid stone behind you and Kirtonos's frontal cone away from the group. Use mitigation when Pierce Armor makes his melee hits more dangerous.
 Healer
- Stand to the side of Swoop and Wing Flap, within reach of the tank's wall position. Call for Curse of Tongues removal before its casting penalty combines with Pierce Armor or a volley.
 Damage
- Stay outside the frontal cone, control a dominated teammate without killing them, and help remove Curse of Tongues if your class can. Save weapon-dependent burst until Disarm ends.
Jandice's crypt
Take the side route to Jandice before descending through the hatchery. Stop the spectral casters on the approach rather than pulling them into Jandice's copies. After the fight, return to the main route toward the ossuary.
Creatures
- Spectral TutorLevel 58–60 Elite Undead
Spectral Tutors burn mana and become invulnerable during Image Projection. Switch to the projections while the original cannot be attacked; their sacrifice heals the tutor if they survive. Preserve an interrupt for Mana Burn when the tutor returns.

Mana Burn

Image Projection
Summons 5 Spectral Projections to fight in the place of the caster, who becomes invisible and invulnerable, though unable to act. After 6 seconds, these apparitions sacrifice their lives to heal the caster, who resumes the battle.
- Spectral TeacherLevel 58–61 Elite Undead
Spectral Teachers can remove a player from the pull with Banish while threatening the group's mana. Interrupt Mana Burn, and remember that a banished ally is invulnerable rather than a target for emergency healing.
Mana Burn

Banish
Banishes an enemy, preventing all action but making it invulnerable for up to 15 seconds. Only one target can be banished at a time.

Jandice Barov
Level 61 Elite UndeadJandice tests whether the group can find the wounded original after each illusion split without letting Curse of Blood turn the copies' attacks into a healing crisis.
Abilities

Summon Illusions
Summons 15 illusions to aid the caster in combat and distract the enemy. Illusions last 30 seconds.
When Jandice splits, find the original by name and remaining health and resume focused damage. The tank should collect the attacking copies before they reach the healer.

Curse of Blood
Remove Curse of Blood when possible, especially from players being hit by the copies; it increases Physical damage taken.
Banish
Banishes an enemy, preventing all action but making it invulnerable for up to 15 seconds. Only one target can be banished at a time.
Banish prevents action but also makes its target invulnerable. Cover the remaining players until the banished player returns.
- Tank
- Pick up the attacking copies as Jandice splits, then keep the original in reach once the group identifies it. Watch for Curse of Blood while several copies are hitting you.
- Healer
- The dangerous overlap is copies attacking a player with Curse of Blood. Request curse removal and distribute healing among the players the copies reach; a banished player cannot take damage.
- Damage
- After each split, look for Jandice's already-depleted health and return to that target. Keep pressure on the original rather than spending the split attacking an arbitrary full-health copy.
Loot

Hatchery and Great Ossuary
Cross the hatchery, then use the stairs into the ossuary instead of dropping into uncleared constructs. Clear Rattlegore's surrounding packs and patrols before pulling the boss. Take the Viewing Room Key and retrace the route to the locked classroom.
Creatures
- Plagued HatchlingLevel 57–59 Dragonkin
Plagued Hatchlings apply Diseased Spit, which reduces Stamina as well as dealing damage. Gather a pack before using area attacks, and remove the disease when the reduced health pool puts a player at risk.

Diseased Spit
Spits at an enemy, inflicting Nature damage and reducing its Stamina for 10 seconds.
- Risen ConstructLevel 58–61 Elite Undead
Risen Constructs hit enemies in front with Arcing Smash. Pull them out of the bone piles into cleared space and keep their frontal arc away from players moving down the stairs.
Arcing Smash
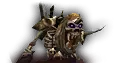
Rattlegore
Level 61 Elite UndeadRattlegore combines heavy melee strikes with a close-range stun and knockback, making the tank's position and the healer's distance the main checks.
Abilities

Strike
Strikes at an enemy, inflicting increased melee damage.
Strike increases Rattlegore's melee damage. Keep the tank healthy enough to survive it alongside an ordinary swing.

Knock Away
Inflicts normal damage plus 30 to an enemy and knocks it back.
Tank with a wall behind you so Knock Away does not send you back into the ossuary's remaining packs.

War Stomp
Keep the healer and ranged attackers away from Rattlegore's close-range War Stomp so the tank's stun does not also stop healing.
- Tank
- Use a cleared wall position to contain Knock Away. Keep mitigation available for Strike and the period when War Stomp prevents you from acting.
- Healer
- Heal from outside Rattlegore's close-range stomp. Keep the tank healthy before the stun, since Strike can follow while the tank cannot respond.
- Damage
- Ranged attackers should stay outside War Stomp. Melee should avoid spreading a Knock Away recovery into uncleared constructs and let the tank settle Rattlegore back at the wall.
Loot

Viewing Room
Open the classroom with Rattlegore's key. The students and lecturers begin neutral, so pass without attacking if skipping the classroom event. For the encounters, use Dawn's Gambit from a doorway or corner, clear the transformed students, then engage Marduk before Vectus.
Creatures
- Scholomance StudentLevel 58–59 Elite Humanoid
Scholomance Students join the classroom fight if the lecturers are attacked while the class is still present. Use Dawn's Gambit to transform the class and defeat it before pulling Marduk or Vectus; avoid accidentally starting the event with an area attack.

Marduk Blackpool
Level 58 Elite UndeadMarduk punishes melee attacks into Shadow Shield while Defiling Aura makes the resulting Shadow damage more dangerous.
Abilities

Shadow Shield
Dispel Shadow Shield if possible. It absorbs damage and retaliates against melee attackers, so ranged damage is safer while it remains.

Defiling Aura
Surrounds the caster with an aura that periodically reduces the Shadow resistance of nearby enemies by 100. The aura lasts until cancelled.
Defiling Aura reduces nearby players' Shadow resistance. Keep players who do not need melee range away from Marduk instead of stacking the group around the shield.
Cleave
Keep other melee players away from the tank's immediate position so Cleave does not hit them together.
Shadow Bolt Volley
Hurls missiles of dark magic, inflicting Shadow damage to nearby enemies.
Expect group Shadow damage from the volley, particularly on players who have remained inside Defiling Aura.
- Tank
- Keep Marduk's Cleave off the group and call for Shadow Shield removal. Holding him away from ranged players limits their exposure to Defiling Aura.
- Healer
- Use a ranged position rather than sharing Marduk's aura with the tank. Watch melee attackers for shield retaliation and prepare group healing for Shadow Bolt Volley.
- Damage
- Remove Shadow Shield if your class can dispel enemy magic. Otherwise let ranged damage carry the shield period rather than feeding its retaliation with unnecessary melee attacks.

Vectus
Level 60 Elite UndeadVectus tests whether the group can leave Flamestrike's burning ground without crowding into the nearby Blast Wave.
Abilities

Flamestrike
Calls down a pillar of flame, burning all enemies in a selected area and inflicting additional damage every 2 sec. for 8 seconds.
Leave the targeted Flamestrike area and keep moving out of its lingering fire instead of stopping after the initial hit.

Blast Wave
Unleashes a wave of flame, inflicting Fire damage to nearby enemies and reducing their movement speed for 6 seconds.
Blast Wave damages and slows nearby enemies. Keep ranged attackers and the healer away from Vectus so the slow does not trap them in Flamestrike.
- Tank
- Move Vectus off Flamestrike patches into the classroom space already cleared of students. Avoid backing the boss into the healer while making that move.
- Healer
- Heal from outside Vectus's close-range Blast Wave and leave Flamestrike immediately. Expect a slowed melee player to need healing while escaping the burning ground.
- Damage
- Ranged players should keep their distance from Blast Wave. Melee should leave Flamestrike even when the wave's slow makes returning to the boss inconvenient.
Laboratory
Clear space around Ras before the laboratory fight so Fear and Chill Nova cannot carry players into another pack. Kormok is a separate optional summon in this room; leave the brazier unused unless the group has come prepared for its shield and summoned attackers.

Kormok
Level 58–60 Elite HumanoidKormok is an optional laboratory summon that tests shield removal and control of summoned attackers before their casters overwhelm the healer.
Abilities

Bone Shield
Dispel Bone Shield promptly if possible; it absorbs damage and damages attackers. Avoid spending a burst into the shield while waiting for its removal.

Summon Bone Minions
Let the tank collect the summoned melee attackers before area damage; do not let them gather around the healer.
Summon Bone Mages
Switch damage to the summoned casters and interrupt their casts rather than leaving them free to attack the healer while everyone hits Kormok.
Shadow Bolt Volley
Hurls missiles of dark magic, inflicting Shadow damage to nearby enemies.
Shadow Bolt Volley adds group damage while summons are active. Keep enough healing available for players who are also being attacked by summons.

Bloodlust
Increases an ally's attack speed by 100% for 30 seconds.
Dispel Bloodlust from its recipient if possible; its increased attack speed makes leaving an attacker on the healer more dangerous.

Enrage
Keep defensive abilities for Enrage rather than exhausting them before Kormok increases his melee pressure.
- Tank
- Keep Kormok controlled while collecting the summoned melee attackers before they reach the healer. Hold a defensive ability for Enrage and call for Bone Shield removal.
- Healer
- Expect the summons and Shadow Bolt Volley to overlap. Tell the tank when a summoned attacker reaches you, and preserve healing for Enrage rather than spending it repairing avoidable Bone Shield retaliation.
- Damage
- Dispel Bone Shield and Bloodlust when your class can. Prioritize and interrupt the summoned casters, then help clear the gathered melee summons before returning damage to Kormok.
Ras Frostwhisperer
Ras FrostwhisperLevel 62 Elite UndeadRas combines group Frost damage with Freeze, Fear and Chill Nova, testing whether the group can keep healing and interrupting after losing movement or control.
Abilities

Frostbolt Volley
Prioritize interrupting Frostbolt Volley to prevent group damage and its movement slow from overlapping the control effects.

Freeze
Stuns an enemy and inflicts Frost damage every 3 sec. for 15 seconds.
Dispel Freeze from a player who must heal or interrupt. It stuns its target while continuing to deal Frost damage.

Chill Nova
Blasts nearby enemies for Frost damage, knocking them back and reducing their movement speed for up to 10 seconds.
Tank against a cleared wall and keep ranged players away from Ras's close-range nova, which knocks back and slows its victims.

Fear
Strikes fear in an enemy, causing it to flee in terror for up to 8 seconds. Only 1 target can be feared at a time.
Clear the routes around the fight before pulling Ras. Remove Fear if possible so its target does not run into another laboratory pack.
- Tank
- Use a cleared wall position to limit Chill Nova's knockback. Keep Ras within the group's interrupt reach when movement resumes after a nova or Fear.
- Healer
- Remove Freeze or Fear from the player whose lost action is threatening the group. Stay away from the close-range nova so a knockback does not interrupt recovery from Frostbolt Volley.
- Damage
- Arrange interrupts for Frostbolt Volley and keep another player ready when the assigned interrupter is Frozen or Feared. Ranged players should avoid the close-range Chill Nova.
Upper study rooms
Work through Malicia's classroom, Krastinov's room and Polkelt's room around the upper level of the study. Finish each chamber before moving on. These rooms can later receive a player separated by Gandling's Shadow Portal, so leaving ordinary enemies alive creates a second fight for that player.

Instructor Malicia
Level 60 Elite HumanoidMalicia tests whether the group can stop direct heals and remove Renew before Corruption and Call of the Grave exhaust its healing.
Abilities

Heal
Calls upon Holy magic to heal an ally.
Assign an interrupt to Heal rather than letting Malicia recover the health the group has just removed.

Flash Heal
Calls upon Holy magic to heal an ally.
Keep an interrupt ready for Flash Heal instead of spending every stop on her damaging effects.

Renew
Dispel Renew from Malicia if possible so the healing does not continue between interrupted casts.

Corruption
Corrupts nearby enemies, inflicting Shadow damage every 3 sec. for 24 seconds.
Remove Corruption from endangered players when possible; it continues dealing Shadow damage while the group is trying to stop Malicia's heals.

Call of the Grave
Recover the group's health before Call of the Grave's delayed Shadow hit, especially on players already affected by Corruption.

Slow
Increases the time between nearby enemies' attacks by 54% and slows their movement by 60% for 10 seconds.
Slow reduces movement and attack speed. Keep Malicia in interrupt reach rather than relying on a slowed attacker to chase a repositioned boss.
- Tank
- Keep Malicia in a stable position so slowed melee players can still reach her healing casts. Use your interrupt on Heal or Flash Heal when the assigned interrupter cannot act.
- Healer
- Remove Corruption where it threatens a player and recover health before Call of the Grave lands. If your class can remove enemy magic, strip Renew rather than healing through another extended cycle.
- Damage
- Coordinate interrupts between Heal and Flash Heal and remove Renew when possible. Keep your stops available for healing casts instead of spending them all on Corruption.

Doctor Theolen Krastinov
<The Butcher>Level 60 Elite HumanoidKrastinov tests whether the tank and healer can survive Rend continuing through Backhand, then keep enough resources for Enrage.
Abilities

Rend
Inflicts Physical damage to an enemy every 3 sec. for 15 seconds.
Rend keeps dealing Physical damage after the initial application. Account for the bleed when judging whether the tank is safe through a stun.
Backhand
Backhands an enemy, stunning it for 2 seconds.
Backhand stuns the target. Keep the tank's health high enough that the ongoing Rend does not require a defensive action during the stun.
Enrage
Save mitigation, healing resources and burst damage for Enrage, when Krastinov's melee attacks become more dangerous.
- Tank
- Keep a defensive ability for Krastinov's Enrage. Do not count on being able to react after Backhand lands while Rend is still ticking.
- Healer
- Maintain enough health on the tank to cover Rend through Backhand, then increase healing when Enrage starts. The bleed continues while the tank is stunned.
- Damage
- Save burst for Enrage to shorten the period of increased melee pressure. Avoid a threat change that leaves an unprepared player taking Krastinov's attacks and Rend.
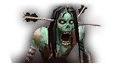
Lorekeeper Polkelt
Level 60 Elite UndeadPolkelt tests whether the group separates and cures Volatile Infection before Nature vulnerability turns its repeated splash damage into a group problem.
Abilities

Volatile Infection
Move the infected player away from allies and cure the disease when possible; Volatile Infection makes its carrier damage nearby teammates.
Noxious Catalyst
Noxious Catalyst reduces Nature resistance. Cure it when possible, and avoid exposing its target to an infected teammate's splash damage.

Corrosive Acid
Corrosive Acid reduces armor. Remove it from the tank when possible instead of treating it as another disease; it is a magic effect.
- Tank
- Keep Polkelt in a stable position so an infected player has room to move away from the group. Request Corrosive Acid removal when its armor penalty increases the melee damage you take.
- Healer
- Cure Volatile Infection and Noxious Catalyst if your class can remove diseases. Corrosive Acid instead needs magic removal; prioritize the tank if the armor loss is threatening them.
- Damage
- Separate from allies when Volatile Infection lands on you and remain apart until it is removed or ends. Avoid standing beside an infected player while Noxious Catalyst has reduced your Nature resistance.
Lower study rooms
Descend to The Ravenian, Lord Alexei Barov and Lady Illucia Barov. Prepare crowd control for Alexei's linked guards before approaching him, and clear Illucia's surrounding enemies before Fear can send someone into them. Finish the remaining chambers before returning to the central study.
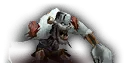
The Ravenian
Level 60 Elite UndeadThe Ravenian tests sustained tank healing as Sundering Cleave reduces armor while Knock Away disrupts the tank's position.
Abilities

Sundering Cleave
Keep players other than the tank out of Sundering Cleave's adjacent targets, and prepare mitigation as its armor penalty accumulates.
Knock Away
Inflicts normal damage plus 30 to an enemy and knocks it back.
Tank with a cleared wall behind you to contain Knock Away rather than being pushed across the study.

Trample
Inflicts Physical damage to nearby enemies.
Trample damages nearby players. Keep ranged attackers and the healer outside close range rather than adding them to the tank's healing load.
- Tank
- Use a wall to contain Knock Away and keep Sundering Cleave off nearby teammates. Use mitigation as the armor penalty grows rather than treating the opening swings as the fight's maximum damage.
- Healer
- Stay out of close-range Trample and expect the tank to need more healing as Sundering Cleave accumulates. Keep the tank's wall position within reach after Knock Away.
- Damage
- Attack away from the tank's cleave position. Ranged attackers should remain outside Trample while maintaining damage so the tank spends less time under the stacking armor penalty.

Lord Alexei Barov
Level 60 Elite UndeadAlexei tests control of his linked guards while Unholy Aura damages nearby players and Veil of Shadow sharply reduces the healing they receive.
Abilities
Unholy Aura
Causes the caster to automatically inflict 150 Shadow damage every 2 sec. to nearby enemies. The aura lasts until cancelled.
Keep the healer and ranged attackers away from Alexei's Unholy Aura rather than making them take its repeated Shadow damage.

Veil of Shadow
Reduces healing effects for nearby enemies by 75% for 15 seconds.
Remove Veil of Shadow as a curse before committing large heals into its healing penalty. It is not removed by a magic dispel.

Immolate
Burns an enemy, then inflicts additional Fire damage every 3 sec. for 21 seconds.
Immolate adds continuing Fire damage to its initial hit. Account for it on a target also taking Unholy Aura damage or affected by Veil of Shadow.
- Tank
- Prepare control for Alexei's linked guards before the pull instead of attempting to pull them separately. Hold Alexei away from the healer and call immediately when Veil of Shadow reduces your incoming healing.
- Healer
- Heal from outside Unholy Aura where possible. Request curse removal on Veil of Shadow before spending large heals, and watch for Immolate adding damage to a player already affected by the aura.
- Damage
- Control or focus the linked guards before leaving their damage on the tank through Veil of Shadow. Ranged players should stay outside Unholy Aura; help remove Veil if your class can remove curses.

Lady Illucia Barov
Level 60 Elite UndeadIllucia tests whether the group can contain a dominated teammate and recover from Fear without letting nearby Silence stop the healer.
Abilities
Dominate Mind
Control the dominated teammate rather than killing them. Release that control when Illucia's domination ends so the player can rejoin the fight.
Fear
Strikes fear in an enemy, causing it to flee in terror for 4 seconds. Only 1 target can be feared at a time.
Clear the area around Illucia before pulling so a feared player cannot bring another room's enemies into the fight.

Silence
Silences nearby enemies, preventing them from casting spells for 10 seconds.
Keep the healer and ranged casters away from Illucia's nearby Silence instead of stacking on the tank.

Curse of Agony
Curses nearby enemies with agony, inflicting Shadow damage every 3 sec. for 30 seconds. Only one curse per warlock can be active on any one target.
Remove Curse of Agony when possible so its continuing Shadow damage does not persist through Fear or Silence.
- Tank
- Pull Illucia only after the surrounding enemies are cleared, and keep the fight away from the healer's ranged position. Recover the boss promptly after Fear rather than dragging Silence onto the casters.
- Healer
- Use a ranged position outside the nearby Silence. Keep Curse of Agony victims healthy before Fear removes their control, and ask a curse remover to clear it when your class cannot.
- Damage
- Control a dominated teammate without killing them and stop attacking that player when domination ends. Ranged casters should stay away from Silence and help clear Curse of Agony when able.
Headmaster's Study
Return to the central study after defeating its surrounding teachers and clearing their rooms. Keep the routes back from those chambers clear before starting Gandling. A player sent through Shadow Portal must defeat the Risen Guardians in the destination room and return to the group.
Creatures
- Risen GuardianLevel 59–61 Undead
Risen Guardians are the enemies in Gandling's portal rooms. The isolated player must defeat them to reopen the exit; running against the closed gate leaves the rest of the group fighting without that player.

Darkmaster Gandling
Level 61 Elite HumanoidGandling tests whether the remaining group can survive losing a player while the isolated player clears a portal room and returns.
Abilities

Shadow Portal
Teleports an enemy to one of 6 locations within Scholomance.
If Shadow Portal sends you to a closed room, defeat its Risen Guardians to reopen the exit and return. Clear the destination rooms before pulling Gandling so ordinary enemies do not join that isolated fight.
Curse of the Darkmaster
Reduces an enemy's Strength by 50 and Stamina by 50 for 1 minute.
Remove Curse of the Darkmaster when possible. The loss of Stamina is particularly dangerous for a player about to fight alone in a portal room.

Arcane Missiles
Launches magical missiles at an enemy, inflicting Arcane damage.
Interrupt Arcane Missiles when possible to reduce the damage the remaining group must heal while a player is isolated.
Shadow Shield
Dispel Shadow Shield when possible. It absorbs damage and retaliates against melee attackers, adding avoidable damage while the group may be missing its healer.
- Tank
- Keep Gandling near the central study so returning players can rejoin quickly. Use defensive abilities if the healer is portaled away; if you are isolated, defeat the room's Risen Guardians and return instead of waiting at the gate.
- Healer
- Keep the tank healthy enough to cover your possible absence. If Shadow Portal selects you, defeat the Risen Guardians in your room and return; staying at its closed exit does not restore healing to the group.
- Damage
- Defeat the Risen Guardians promptly if you are portaled away. While you remain with Gandling, interrupt Arcane Missiles, remove Shadow Shield if able and help remove Curse of the Darkmaster before a weakened player is isolated.


