 Azeroth DB
Stratholme (55 - 62)
Requires level 555 playersEastern Plaguelands 26.1, 10.4
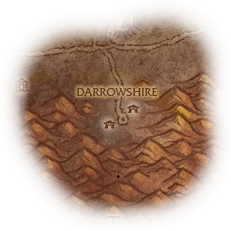
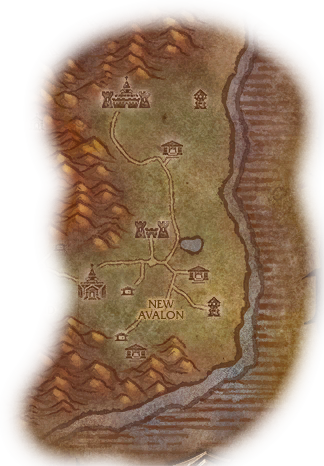
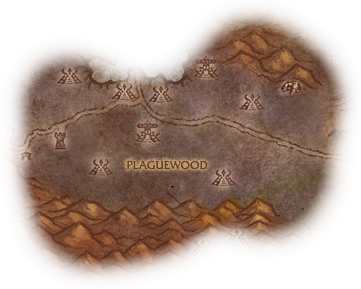
For equipment runs in the Eastern Plaguelands, take a five-player group to Stratholme and agree on the main gate or service entrance before travelling. The Scarlet Bastion ends at Balnazzar; the ziggurat and slaughterhouse route ends at Baron Rivendare.








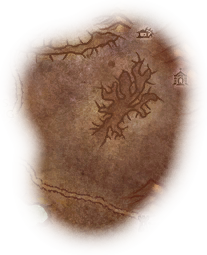
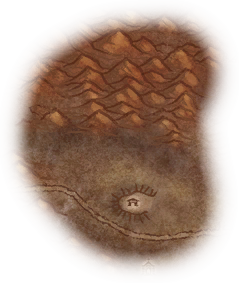
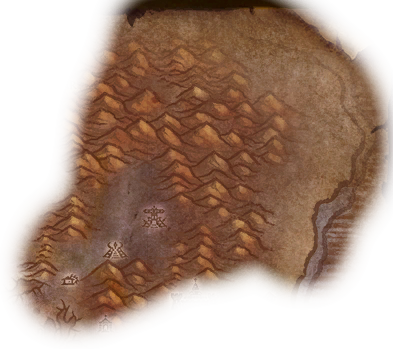
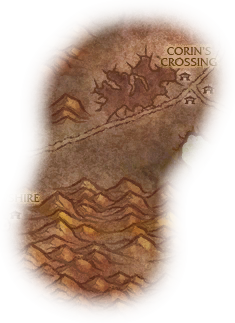
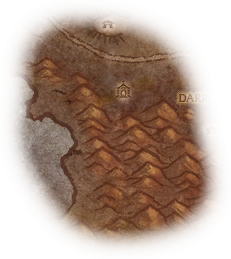
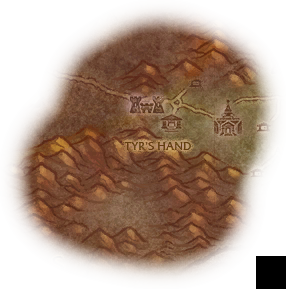
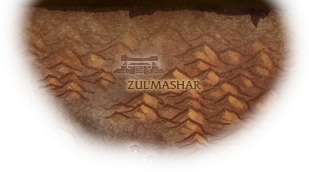

Preparation
For the Scarlet Bastion branch, arrange for someone to bring The Scarlet Key. Carry it separately from the Key to the City used for the undead route.
Bring the Key to the City for the service entrance and the gates into the undead route. If nobody has the key, enter through the main gate and obtain it from Magistrate Barthilas. Alliance and Horde use the same key.
For Postmaster Malown, obtain postbox keys from Stratholme Courier and match their names to the boxes the group will open. Opening a postbox starts a fight; finish that pull before opening another box.
Assign someone to use the cannons against Cannon Master Willey's Crimson Riflemen. Collect Scarlet Cannonballs in the cannon room as the approach is cleared, rather than discovering during the fight that the cannon operator has no ammunition.


Stratholme
From the main gate, clear the streets toward Festival Lane and Market Row without crossing the next arch during an existing pull. The Unforgiven ambush brings Vengeful Phantoms into the street. Check for Hearthsinger Forresten and Skul while travelling, but do not depend on either rare appearing. Ezra Grimm's tobacco box and the postboxes are deliberate side encounters; clear their surroundings before interacting.
Creatures
- Thuzadin NecromancerLevel 59–61 Elite Humanoid
Thuzadin Necromancers combine Bone Armor with Soul Tap. Ordinary weapon hits do not delay casts through the shield; use a dedicated interrupt on Soul Tap so the caster cannot drain the group's health and mana while recovering its own.

Bone Armor

Soul Tap
Taps into an enemy's soul. Steals 350 health every 2 sec. and 350 mana every 2 sec., transferring them to the caster. Lasts 12 seconds.
- Vengeful PhantomLevel 56–57 Undead
Vengeful Phantoms join The Unforgiven's ambush and use Frost Shock. Gather them at the arch before area attacks, and let slowed players rejoin before moving into another street pack.

Frost Shock
Inflicts Frost damage to an enemy and reduces its movement speed for 8 seconds.

Incorporeal Defense
- Stratholme CourierLevel 57 Elite Undead
Stratholme Courier is the postbox-key target, not a harmless passer-by. Keep the healer out of melee reach so Pummel cannot interrupt a heal while the group fights for the keys.

Pummel
Pummels an enemy for 45 damage and interrupts the spell being cast for 5 seconds.

Hearthsinger Forresten
Level 57 Elite UndeadHearthsinger Forresten combines a breakable sleep with ranged volleys, so the group must preserve a working healer without standing together around the shooting target.
Abilities

Enchanting Lullaby
Lulls an enemy to sleep for up to 10 seconds. Any damage caused will awaken the target. Only one target can be asleep at a time.
Interrupt Enchanting Lullaby; if it lands, a magic dispel can return the sleeping player to the fight.

Multi-Shot
Leave space around the current target so Multi-Shot does not catch the healing position as well.

Demoralizing Shout
Demoralizing Shout weakens weapon damage; keep spell damage on Forresten while the melee attack-power penalty lasts.

Shoot
Shoots at an enemy, inflicting Physical damage.
Establish the pull in a cleared street so ranged shooting does not draw the group into another pack.
Incorporeal Defense
Incorporeal Defense increases dodge; spell damage avoids that obstacle to weapon attacks.
 Tank
- Bring Forresten into the cleared street and leave room behind the shooting target for the healer to stand apart. Do not chase the ranged fight through an uncleared arch while an ally is asleep.
 Healer
- Stand apart from the shooting target to avoid sharing Multi-Shot. Remove Enchanting Lullaby from an ally when possible; arrange another player's magic dispel if the sleep catches you.
 Damage
- Reserve an interrupt for Enchanting Lullaby and spread away from the shooting target. Spell attacks keep contributing through Incorporeal Defense and Demoralizing Shout.
Loot


The Unforgiven
Level 57 Elite UndeadThe Unforgiven is a street ambush in which Frost Nova can pin the party beside the Vengeful Phantoms before the tank has gathered the pull.
Abilities

Frost Nova
Inflicts Frost damage to nearby enemies, immobilizing them for up to 8 seconds.
Frost Nova damages and roots nearby players. Clear the landing area before crossing the arch and remove a root when it prevents a player from reaching safety.
Incorporeal Defense
Incorporeal Defense makes weapon attacks easier to dodge; spell damage remains useful while the tank gathers the ambush.
- Tank
- Cross the ambush arch only after the previous street pack is dead. Gather The Unforgiven and Vengeful Phantoms at the cleared side so a Frost Nova does not strand the healer among uncollected attackers.
- Healer
- Enter the arch with the group instead of being left behind when the ambush triggers. Keep healing through Frost Nova and the phantoms' Frost Shock slows while the tank gathers them.
- Damage
- Wait for the Vengeful Phantoms to reach the tank before using area damage. Avoid drawing a second street pack while rooted players are still recovering from Frost Nova.
Ezra Grimm
Level 61 Elite UndeadEzra Grimm turns the tobacco-box detour into a frontal fire fight with a nearby stun, so the box must be approached from an already-cleared street.
Abilities

Flame Breath
Flame Breath hits a frontal cone. Point Ezra into cleared space and keep other players behind or beside the boss.

Smoke Bomb
Casts a smoke bomb, stunning nearby enemies for 4 seconds.
Smoke Bomb stuns nearby enemies. Keep the healer back so the stun does not remove healing at the same time that the tank cannot act.
- Tank
- Take Ezra as soon as the tobacco-box encounter starts and direct Flame Breath into the cleared street. Keep the healer out of that cone and away from the nearby Smoke Bomb stun.
- Healer
- Heal from behind or beside Ezra at range, outside the frontal breath. Keep the tank healthy before Smoke Bomb instead of standing close enough to be stunned with the melee group.
- Damage
- Let the tank turn Ezra before committing melee damage. Stay out of the Flame Breath cone and leave the healer separate from the players exposed to Smoke Bomb.

Postmaster Malown
Level 60 Elite UndeadMalown turns the postbox detour into a fear-and-curse fight where a slowed healer and a stunned tank can leave the pull without a working response.
Abilities

Backhand
Backhands an enemy, stunning it for 2 seconds.
Backhand stuns its victim. Keep the tank's health buffered and avoid taking a fresh postbox pull during that loss of control.

Fear
Strikes fear in an enemy, causing it to flee in terror for 4 seconds. Only 1 target can be feared at a time.
Clear around the chosen postboxes before the event so Fear sends players through safe streets rather than surviving packs.

Curse of Weakness
Remove Curse of Weakness from weapon attackers when possible so the fight does not stall under reduced Physical damage.

Curse of Tongues
Forces an enemy to speak in Demonic, reducing its casting speed by 50% for 15 seconds. Only one curse per warlock can be active on any one target.
Prioritize Curse of Tongues on the healer; its casting slowdown makes recovering the tank after Backhand harder.
Incorporeal Defense
Incorporeal Defense increases dodge; keep spell damage contributing while the party handles Malown's curses.
- Tank
- Start the postbox event only with a cleared escape area for Fear. Keep Malown and the current pull in that space so Backhand does not leave attackers loose beside the next unopened box.
- Healer
- Ask the curse remover to prioritize Curse of Tongues on you. Keep the tank healthy enough to survive Backhand while fear or a casting slowdown interrupts your response.
- Damage
- Remove the healer's Curse of Tongues before Curse of Weakness on an attacker when both need attention. Finish Malown and the current postbox pull before opening another box.
Skul
Level 58 Elite UndeadSkul's frost slows make a moving street pull risky while Frostbolt and Arcane Bolt continue damaging the target.
Abilities

Frost Armor
Frost Armor chills melee attackers. Settle the fight in cleared space instead of making slowed players chase Skul through the streets.
Frost Shock
Inflicts Frost damage to an enemy and reduces its movement speed for 8 seconds.
Frost Shock slows its victim. Let that player rejoin before moving into the next pack.

Frostbolt
Inflicts Frost damage to an enemy and reduces its movement speed for 4 seconds.
Interrupt Frostbolt to prevent both its damage and another movement slow.

Arcane Bolt
Hurls a magical bolt at an enemy, inflicting Arcane damage.
Use spare interrupts on Arcane Bolt after preserving an answer to Frostbolt.
- Tank
- Bring the rare into an already-cleared street and keep Skul there. Do not retreat through another pack while Frost Armor and Frost Shock prevent melee players from following promptly.
- Healer
- Keep the bolt target in sight and watch the player slowed by Frost Shock before the group moves. A stationary fight is safer than following Skul through successive street pulls.
- Damage
- Interrupt Frostbolt and use spare interrupts on Arcane Bolt. Favor a settled position for melee attacks because Frost Armor slows attackers who try to chase the caster.
Crusaders' Square
Clear the Crimson defenders outside the Scarlet Bastion before entering the building. Watch the cleared courtyard behind the group for Timmy the Cruel as the defenders fall. Fight Timmy there if the encounter appears, rather than carrying its extra melee attacks into the next Crimson pull.
Creatures
- Crimson MonkLevel 58–60 Elite Humanoid
Crimson Monks can interrupt nearby casters with Kick while Thrash adds extra melee attacks. Keep the healing position away from the monk and avoid combining its attack bursts with Timmy's.

Kick

Thrash
Gives the caster 2 extra attacks.

Timmy the Cruel
Level 58 Elite UndeadTimmy's extra attacks and health-stealing claw turn the courtyard pull into a tank-survival fight that becomes more dangerous during Enrage.
Abilities
Thrash
Adds a chance to do two additional attacks.
Thrash creates extra-attack bursts; keep enough tank health and mitigation to survive several hits together.
Ravenous Claw
Ravenous Claw both hurts its victim and restores Timmy's health; keep damage focused on Timmy rather than letting the courtyard pull spread.

Enrage
Use a tank defensive during Enrage while the group finishes Timmy.
- Tank
- Keep Timmy in the cleared courtyard instead of entering the Bastion with the ghoul attached. Hold a defensive for Enrage and the extra attacks from Thrash.
- Healer
- Begin with the tank healthy enough for a Thrash burst, then restore the health Ravenous Claw removes. Do not start recovering mana just because Timmy is nearly defeated; Enrage makes the finish more dangerous.
- Damage
- Finish Timmy before taking another Crimson pull. Spend damage cooldowns on the Enrage finish so the tank spends less time taking enraged Thrash bursts.
Scarlet Bastion
Work through the Hall of Lights to Malor, then continue to Willey's cannon room and Galford's archive before the final chamber. Dathrohan's transformation begins the Balnazzar portion of that last fight, not the end of the branch. Blacksmithing Plans along the Bastion route can summon Crimson Hammersmith; treat the plans as an optional pull when encountered, not a required stop after Balnazzar.
Creatures
- Crimson InquisitorLevel 59–60 Elite Humanoid
Crimson Inquisitors threaten the healer's mana with Mana Burn while Shadow Word: Pain continues to tick. Interrupt Mana Burn before spending interrupts on lesser casts; remove the damage-over-time effect when possible. Mind Flay can slow a player trying to leave the next pull's path.

Mana Burn

Shadow Word: Pain
Utters a word of darkness, inflicting Shadow damage to an enemy every 3 sec. for 18 seconds.

Mind Flay
Inflicts Shadow damage to an enemy and reduces its movement speed for 3 seconds.
- Crimson RiflemanLevel 57–58 Humanoid
Crimson Riflemen are Willey's ranged reinforcements. The cannon operator should use the room's cannons on them while the tank keeps Willey away from the operator; ignoring their shooting leaves the healer covering both the boss and the firing line.
Shoot
Shoots at an enemy, inflicting Physical damage.
Malor the Zealous
Level 60 Elite HumanoidMalor combines a nearby stun with healing, so the group must stop Holy Light without leaving the healer inside Ground Smash.
Abilities

Ground Smash
Inflicts Physical damage to nearby enemies, stunning them for 3 seconds.
Keep ranged players beyond Ground Smash so its stun does not disable both the tank and healer.

Head Crack
Head Crack reduces Stamina; watch the affected player's reduced health pool rather than assuming the earlier health buffer still applies.

Holy Light
Calls upon Holy magic to heal an ally.
Interrupt Holy Light so Malor cannot undo the group's damage or heal a surviving Crimson ally.

Lay on Hands
Heals an ally for an amount equal to the caster's maximum health. Drains all of the caster's remaining mana when used.
Lay on Hands can restore a badly injured ally. Expect a sudden health recovery rather than treating low boss health as the end of the fight.
- Tank
- Isolate Malor from other Crimson enemies and keep Ground Smash away from the healing position. Keep an interrupt available for Holy Light instead of spending it on an attack.
- Healer
- Stay outside Ground Smash and account for Head Crack's smaller health pool. Continue healing through a sudden Lay on Hands recovery rather than moving on to the next room.
- Damage
- Assign Holy Light interrupts before pulling Malor. Keep attacking after Lay on Hands and avoid bringing another injured Crimson enemy into reach of Malor's heals.
Cannon Master Willey
Level 60 Elite HumanoidWilley tests whether the party can keep the boss anchored while a cannon operator removes the Crimson Riflemen.
Abilities
Knock Away
Inflicts normal damage plus 30 to an enemy and knocks it back.
Tank with solid scenery behind you so Knock Away does not throw you out of the cannon room's established position.
Pummel
Pummels an enemy for 45 damage and interrupts the spell being cast for 5 seconds.
Keep the healer out of Willey's melee reach so Pummel cannot lock out a needed heal.
Shoot
Shoots at an enemy, inflicting Physical damage.
Willey also shoots ranged players; the healer must cover the cannon operator as well as the tank.

Summon Crimson Rifleman
Use the room's cannons on the summoned Crimson Riflemen. Keep Scarlet Cannonballs ready instead of allowing each firing line to accumulate.
- Tank
- Anchor Willey with your back against solid scenery and leave the cannon route clear. Do not drag the boss onto the cannon operator while recovering from Knock Away.
- Healer
- Stay outside Pummel reach while keeping the cannon operator in healing range. Riflemen and Willey's Shoot can damage that player even when the tank is stable.
- Damage
- Put the assigned cannon operator on riflemen duty with Scarlet Cannonballs ready. Other attackers stay on Willey unless a reinforcement threatens the operator or healer.
Loot

Archivist Galford
Level 60 Elite HumanoidGalford punishes missed Pyroblast interrupts and forces the healer to deal with Burning Winds without standing in Fire Nova.
Abilities

Pyroblast
Inflicts Fire damage to an enemy, then additional damage every 3 sec. for 12 seconds.
Interrupt Pyroblast before its initial hit and lingering fire damage reach the target.

Burning Winds
Stuns an enemy and inflicts 1600 Fire damage over 8 seconds.
Remove Burning Winds with a magic dispel when possible; otherwise heal the stunned target through its fire damage.

Fire Nova
Inflicts Fire damage to nearby enemies.
Keep the ranged and healing positions away from Galford so Fire Nova does not become party-wide healing work.
- Tank
- Hold Galford away from the healing position and keep a Pyroblast interrupt ready. Do not reposition toward the healer when Burning Winds stuns another player.
- Healer
- Stay beyond Fire Nova and prioritize a Burning Winds dispel or healing the stunned victim. A Pyroblast that lands adds continuing damage after the initial hit.
- Damage
- Assign Pyroblast interrupts and keep a backup ready if the primary interrupter is caught by Burning Winds. Ranged attackers should not stand beside Galford for Fire Nova.
Loot

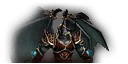
Dathrohan's transformation extends the fight into Balnazzar's fear, sleep and mind control, so the party must preserve resources and control affected allies rather than damage them indiscriminately.
Abilities

Crusader's Hammer
Stuns nearby enemies, rendering them unable to move or attack for 4 seconds.
Crusader's Hammer stuns nearby enemies; keep the healing position away from Dathrohan and prepare tank health before the stun.

Crusader Strike
Crusader Strike increases the Holy damage its victim takes; expect the tank's Holy damage pressure to grow during Dathrohan's part of the fight.
Holy Strike
Holy Strike adds a Holy weapon hit, so armor alone does not cover the tank's incoming damage.

Balnazzar Transform
The transformation restores health and begins the demon fight. Keep resources for Balnazzar instead of stopping when Dathrohan is nearly defeated.
Mind Blast
Inflicts Shadow damage to an enemy, but causes a high amount of threat.
Keep Mind Blast's target healthy while the party recovers from the encounter's control effects.

Shadow Shock
Instantly lashes nearby enemies with dark magic, inflicting Shadow damage.
Shadow Shock hits nearby enemies; keep ranged players away from Balnazzar rather than adding them to the melee healing load.

Psychic Scream
Lets out a psychic scream, causing up to 5 nearby enemies to flee for 6 seconds.
Fight inside cleared space so Psychic Scream cannot send players into surviving Crimson enemies. Use available fear protection or removal for the healing position.

Sleep
Puts an enemy to sleep for up to 20 seconds. Any damage caused will awaken the target. Only one target can be asleep at a time.
Remove Sleep from the healer or the player assigned to control a mind-controlled ally when a magic dispel is available.

Mind Control
Use nonlethal crowd control on the mind-controlled teammate and stop attacks that would kill that player. Re-establish the boss target when control ends.
- Tank
- Keep Dathrohan's nearby stun away from the healer and retain a defensive for the Holy damage pressure. After transformation or a loss of control, regain Balnazzar before the group resumes full damage.
- Healer
- Preserve mana for the health-restoring transformation. Stand beyond Shadow Shock, remove Sleep when possible, and cover the new boss target if Mind Control takes the tank out of action.
- Damage
- Keep resources for the demon form. Crowd-control a mind-controlled ally instead of including that player in area damage, and keep the fight inside cleared space for Psychic Scream.
Crimson Hammersmith
Level 60 Elite HumanoidCrimson Hammersmith is a plans-triggered detour whose Bone Smelt makes a simultaneous Crimson trash pull dangerous for the armor-reduced victim.
Abilities

Bone Smelt
Bone Smelt deals Fire damage and reduces armor. Keep the affected player away from extra Crimson attackers and cover the increased physical damage afterward.
- Tank
- Clear the alcove around the Blacksmithing Plans before activating the Hammersmith. Keep the summoned opponent isolated so Bone Smelt's armor loss does not amplify another Crimson pack's attacks.
- Healer
- Heal Bone Smelt's Fire hit, then continue watching its armor-reduced victim during melee attacks. Restore that player's health before the group starts another Bastion pull.
- Damage
- Finish the Hammersmith in the cleared alcove instead of combining the detour with nearby Crimson enemies. Do not activate more plans or start another pull while Bone Smelt leaves the current victim exposed.
The Gauntlet
Enter from the service entrance or return from the Scarlet branch, then work through Anastari's, Nerub'enkan's and Maleki's ziggurats. After each boss, enter its building and clear the Thuzadin Acolytes; leaving them alive keeps the route to Slaughter Square shut. Deal with Magistrate Barthilas before the square if the service-entrance approach sent the magistrate running. Black Guard Swordsmith is a plans detour by Anastari's ziggurat, and Stonespine is an optional patrol encounter rather than a gate requirement.
Creatures
- Thuzadin AcolyteLevel 59–60 Humanoid
Thuzadin Acolytes inside the ziggurats are part of opening the route, even after the boss outside has died. Clear each interior before travelling to the next ziggurat instead of returning later to search for a missed acolyte.
- Wailing BansheeLevel 58–59 Elite Undead
Wailing Banshees use Anti-Magic Shield and Banshee Curse. While the shield blocks spells, use physical attacks or put spell damage into an unshielded target; remove the curse from weapon attackers so their attacks can connect again.

Anti-Magic Shield
Creates an anti-magic shell around the caster, giving it magic immunity for 10 seconds.

Banshee Curse
- Shrieking BansheeLevel 57–58 Elite Undead
Shrieking Banshees can silence nearby players with Deafening Screech while Banshee Wail keeps damaging a target. Keep the healer back from the pack and stop the screech when possible, rather than placing every caster beside the tank.

Deafening Screech
Silences nearby enemies, preventing them from casting spells for 8 seconds.
Banshee Wail
Wails with anguish, inflicting Shadow damage to an enemy.

Baroness Anastari
Level 59 Elite UndeadAnastari interrupts normal boss damage by possessing an ally, requiring controlled damage to free that player without killing them.
Abilities
Banshee Wail
Wails with anguish, inflicting Shadow damage to an enemy.
Banshee Wail adds Shadow damage to an individual target; restore that player's health while preserving the ability to handle Possess.
Banshee Curse
Remove Banshee Curse from weapon attackers when possible so their attacks can connect again.

Silence
Silences nearby enemies, preventing them from casting spells for 10 seconds.
Keep the healer away from Anastari's nearby Silence; another player's magic dispel can remove the effect if the healer is caught.
Possess
Takes control of a humanoid enemy up to level 100 for 2 minutes. and increases its maximum health by 2000%.
When Anastari possesses an ally, damage that player carefully until possession ends. Stop immediately when the ally is freed; do not leave lethal damage-over-time effects running on them.
- Tank
- Keep Anastari on the cleared ziggurat approach with the healer at range. When Possess removes the boss from reach, stay ready to pick Anastari up again rather than chasing into another pack.
- Healer
- Stay outside the nearby Silence when possible. Do not counteract the controlled damage being used to free the possessed player; be ready to heal that ally as soon as possession ends.
- Damage
- Switch from Anastari to the possessed teammate using controlled damage, then stop as soon as the player is freed. Avoid long damage-over-time effects and resume boss damage only after the tank has Anastari again.
Loot

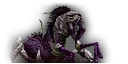
Nerub'enkan
Level 60 Elite UndeadNerub'enkan combines an armor penalty with webs and summons, making it dangerous to scatter away from the tank on the ziggurat approach.
Abilities

Encasing Webs
Immobilizes an enemy and increases the time between its attacks by 100% for 6 seconds.
Encasing Webs roots its victim and slows their attacks. Keep the fight in cleared space so the rooted player does not need to escape another pack.

Pierce Armor
Reduces an enemy's armor by 50% for 20 seconds.
Pierce Armor reduces the victim's armor; prepare tank mitigation and healing for the resulting melee pressure.

Crypt Scarabs
Summons 6 Crypt Scarabs to aid the caster in battle for 10 seconds.
Gather the summons beside Nerub'enkan and use cleave or area damage without moving the boss into uncleared streets.

Raise Undead Scarab
Protect the healer from this additional summon before returning to uninterrupted boss damage.
- Tank
- Keep Nerub'enkan and the summons together on the cleared ziggurat approach. Use mitigation when Pierce Armor is active instead of trying to solve the armor loss by retreating through more packs.
- Healer
- Expect the tank to need more healing during Pierce Armor. Keep rooted players in reach and bring a pursuing summon back toward the tank rather than running down an uncleared street.
- Damage
- Use cleave on summons once the tank has gathered them, then return to Nerub'enkan. Do not chase a stray attacker through another pack while Encasing Webs prevents the group from following.
Loot


Maleki the Pallid
Level 61 Elite HumanoidMaleki removes a player from action with Ice Tomb while draining health and mana, so the remaining players must cover the missing role without wasting a dispel on the tomb.
Abilities
Frostbolt
Inflicts Frost damage to an enemy and reduces its movement speed for 4 seconds.
Interrupt Frostbolt to reduce its damage and movement slow while another player may be unable to act.

Ice Tomb
Stuns an enemy, rendering it unable to move or attack for 10 seconds.
Ice Tomb stuns its target and is not removed by a normal magic dispel. Keep that player alive and cover their role until they can act again.
Drain Life
Remove Drain Life with a magic dispel when possible so Maleki does not turn the target's lost health into healing.
Drain Mana
Remove Drain Mana promptly when it affects the healer; its continuing drain threatens the rest of the ziggurat fight.
Frost Armor
Frost Armor chills melee attackers. Keep Maleki in a settled position rather than making slowed attackers chase the boss along the ziggurat approach.
- Tank
- Hold Maleki on the cleared approach and interrupt Frostbolt when available. Keep summons from other pulls out of the fight so an Ice Tomb does not leave an uncontrolled extra pack.
- Healer
- Remove Drain Life and Drain Mana when possible, but do not spend repeated dispels on Ice Tomb. If the tomb catches you, the group must interrupt Frostbolt and use personal defenses until you can heal again.
- Damage
- Preserve Frostbolt interrupts while another player is in Ice Tomb. Ease pressure if the tank cannot act, and help remove a drain from the healer if your class can do so.
Loot

Magistrate Barthilas
Level 58 Elite UndeadBarthilas combines growing Furious Anger with a knockback and nearby spell interruption, so positioning must preserve the tank's contact without exposing the healer.
Abilities
Furious Anger
Furious Anger builds the magistrate's attack pressure. Use damage cooldowns early and retain tank mitigation for the later part of the fight.

Draining Blow
Drains 250 health from an enemy, transferring it to the caster.
Draining Blow restores health to Barthilas while damaging the victim; keep the group focused through that recovery.
Crowd Pummel
Pummels nearby enemies for normal damage plus 10 and interrupts any spell being cast 75% of the time for 5 seconds.
Crowd Pummel interrupts nearby casters. Put the healing position outside the melee group.
Mighty Blow
Use a wall behind the tank for Mighty Blow. If Barthilas turns after a knockback, pause damage and bring the boss back toward the tank.
- Tank
- Use solid scenery behind you for Mighty Blow, with the healer outside Crowd Pummel reach. Keep a defensive for the growing Furious Anger pressure rather than using every cooldown on the opening hit.
- Healer
- Stay out of the melee group's Crowd Pummel and prepare for stronger attacks as Furious Anger builds. Keep the tank in sight after Mighty Blow instead of following the knockback into an uncleared pull.
- Damage
- Use offensive cooldowns before Furious Anger accumulates. If Mighty Blow sends the tank away and Barthilas turns toward you, move toward the tank and pause attacks rather than running deeper into the square.
Black Guard Swordsmith
Level 61–62 Elite UndeadThe Swordsmith is an optional Blacksmithing Plans ambush beside a ziggurat, where Banshee Curse can weaken the party's weapon attacks.
Abilities
Banshee Curse
Remove Banshee Curse from weapon attackers when possible, especially if the tank's attacks are failing to connect after the ambush.
- Tank
- Stand ready beside Anastari's cleared ziggurat stairs before a player touches the Blacksmithing Plans. Take the Swordsmith off the reader immediately rather than letting the ambush move into the next street pull.
- Healer
- Be ready before the plans are touched, since the Swordsmith attacks the activating player. Help remove Banshee Curse when your class can do so and keep the reader alive during the pickup.
- Damage
- Wait for the tank's pickup after the plans summon the Swordsmith. A curse remover should restore weapon attackers' hit chance before committing the group's damage cooldowns.
Stonespine
Level 60 Elite UndeadStonespine is a rare gauntlet patrol whose Vicious Rend can carry damage into the next pull even after the gargoyle dies.
Abilities

Vicious Rend
Inflicts Physical damage to an enemy every 3 sec. for 15 seconds.
Vicious Rend continues dealing Physical damage after it is applied. Keep healing its victim after Stonespine dies and avoid adding a new pull while the bleed leaves that player vulnerable.
- Tank
- Wait for Stonespine to reach a cleared part of the gauntlet instead of chasing the patrol through other enemies. Do not immediately add another pack while Vicious Rend is still damaging its victim.
- Healer
- Continue healing Vicious Rend after the gargoyle falls. Restore the affected player's health before the group commits to the next ziggurat or street pull.
- Damage
- Pull the rare only when the tank can meet its patrol in cleared space. Finish Stonespine without tagging nearby enemies, then let the Rend victim recover before starting another fight.
Slaughter Square
Finish the abominations in the square to bring Ramstein out of the slaughterhouse. Ramstein's death is followed by an incoming wave and the Black Guard Sentries, so keep the group together instead of rushing the final door. Defeat the sentries before entering Rivendare's room, then establish the tank and ranged positions before the final pull.
Creatures
- Bile SpewerLevel 59–60 Elite Undead
Bile Spewers combine Thrash attack bursts with summons during combat and on death. Leave room for the tank to gather the extra attackers, and finish the death-spawned pull before engaging another abomination.
Thrash
Adds a chance to do two additional attacks

Spawn Bile Slime
Spawn Bile Slimes
- Venom BelcherLevel 60–61 Elite Undead
Venom Belchers spread Venom Spit to nearby enemies, adding poison damage after the initial hit. Keep ranged players back from the abomination and remove poison from affected players when possible before continuing through the square.

Venom Spit
Spits poison at nearby enemies, inflicting Nature damage, then additional damage every 5 sec. for 10 seconds.
- Black Guard SentryLevel 58–59 Elite Undead
Black Guard Sentries are the last gate encounter before Rivendare. Keep their Cleave away from the healing position and gather the sentries before area damage; Shadow Shock adds magical damage to the pull's melee pressure.

Cleave
Shadow Shock
Instantly lashes an enemy with dark magic, inflicting Shadow damage.
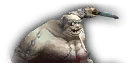
Ramstein the Gorger
Level 61 Elite UndeadRamstein's Knockout interrupts the tank's control while Trample and Flurry punish a group that has not finished the square's abominations.
Abilities

Trample
Trample hits nearby enemies; keep ranged players away from Ramstein so they do not share the tank's damage.
Knockout
Inflicts normal damage plus 300 to an enemy, knocking it back and stunning it for 6 seconds.
Knockout both knocks back and stuns the victim. Use solid scenery behind the tank and avoid bursting while the tank cannot act.
Flurry
Increases your attack speed by 30% for your next 3 swings after dealing a critical strike.
Flurry accelerates attacks after a critical strike; keep a health buffer for the faster follow-up swings.
- Tank
- Meet Ramstein in the cleared square with a wall behind you for Knockout. Use mitigation before losing the ability to act, and regain contact before the group resumes burst damage.
- Healer
- Keep the tank healthy before Knockout and cover the faster swings from Flurry. Stand away from Trample while keeping both the tank and a possible new target in reach.
- Damage
- Pause burst damage during Knockout if the tank loses contact, and bring a pursuing Ramstein toward the tank rather than across the square. After the kill, regroup for the following wave instead of rushing the slaughterhouse door.
Loot

Baron Rivendare
Level 62 Elite UndeadRivendare combines a healing-reduction strike with persistent nearby Shadow damage and summons that heal the boss if left alive.
Abilities
Unholy Aura
Causes the caster to automatically inflict 150 Shadow damage every 2 sec. to nearby enemies. The aura lasts until cancelled.
Keep ranged attackers and the healer outside Unholy Aura when their range permits; reserve continuing healing for players who must stay near Rivendare.

Mortal Strike
Inflicts 300% weapon damage and leaves the target wounded, reducing the effectiveness of any healing by 50% for 5 seconds.
Mortal Strike reduces incoming healing as well as dealing a heavy hit. Prepare tank health and mitigation before the debuff instead of relying entirely on a large heal afterward.
Cleave
Cleave also strikes allies near its victim. Keep the tank's side of Rivendare clear of the healer and other melee attackers.
Shadow Bolt
Hurls a bolt of dark magic at an enemy, inflicting Shadow damage.
Interrupt Shadow Bolt to free healing for the Mortal Strike victim and the players inside Unholy Aura.
Raise Dead
Attempts to raise an undead servant back to life to aid the caster in battle. After 12 seconds, if the servant still lives, it will sacrifice itself to heal the caster.
Destroy the raised servants before they sacrifice themselves to heal Rivendare. Keep an area-damage player able to protect the healer when they arrive.
- Tank
- Anchor Rivendare near a wall with your side of the boss clear for Cleave. Preserve mitigation and a health buffer for Mortal Strike so the healer is not trying to recover the entire hit through reduced healing.
- Healer
- Use the room's width to stand outside Unholy Aura while keeping the tank in range. Prepare the tank for Mortal Strike and bring pursuing raised servants toward the assigned area-damage player.
- Damage
- Move opposite the tank for Cleave, interrupt Shadow Bolt, and immediately destroy raised servants before they heal Rivendare. Ranged attackers should not stand inside Unholy Aura merely to stay near the boss.


